|
HACHETTE PARTWORKS - BUILD YOU OWN ROUTEMASTER |
||
|
|
|
|
|
ISSUES SIXTY ONE TO SEVENTY |
||
|
HACHETTE PARTWORKS - BUILD YOU OWN ROUTEMASTER |
||
|
|
|
|
|
ISSUES SIXTY ONE TO SEVENTY |
||
| TO RETURN TO THE MAIN INDEX CLICK HERE |
|
Photographs taken by me of the magazine pages are purely to illustrate the build stages, so that the entire project can be followed from the start to the completed model in issue order. The copyright of Hachette Partworks is acknowledged. |
|
MAGAZINE
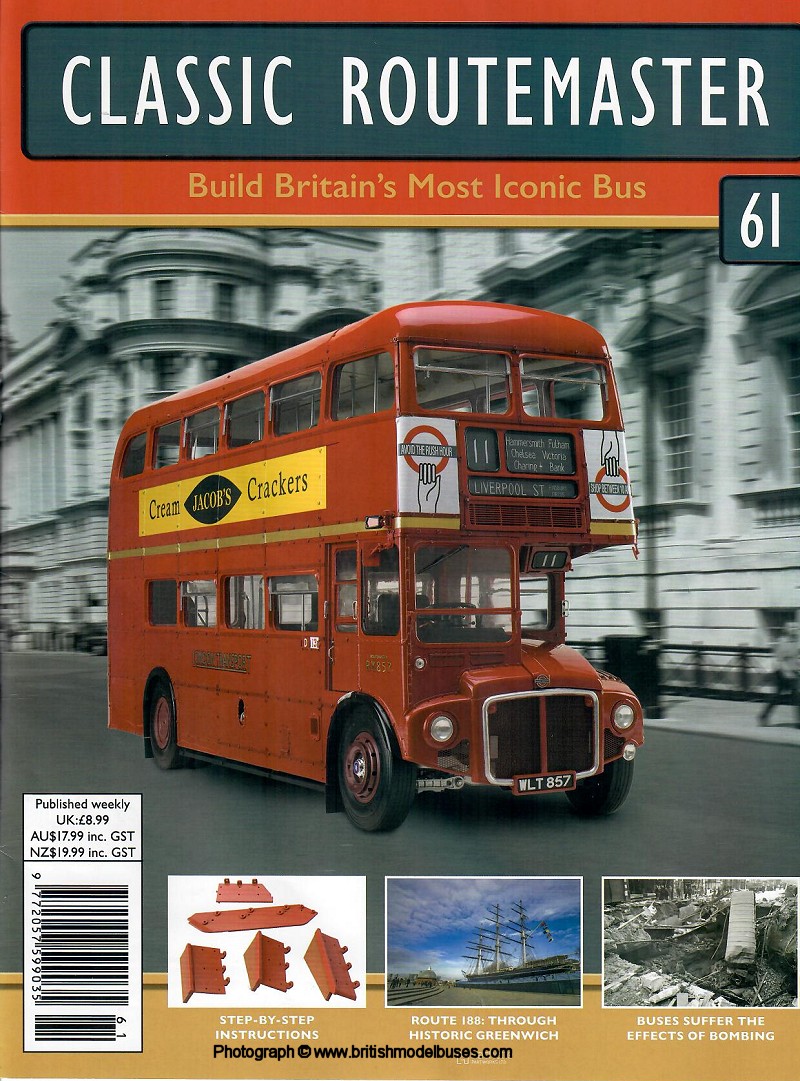
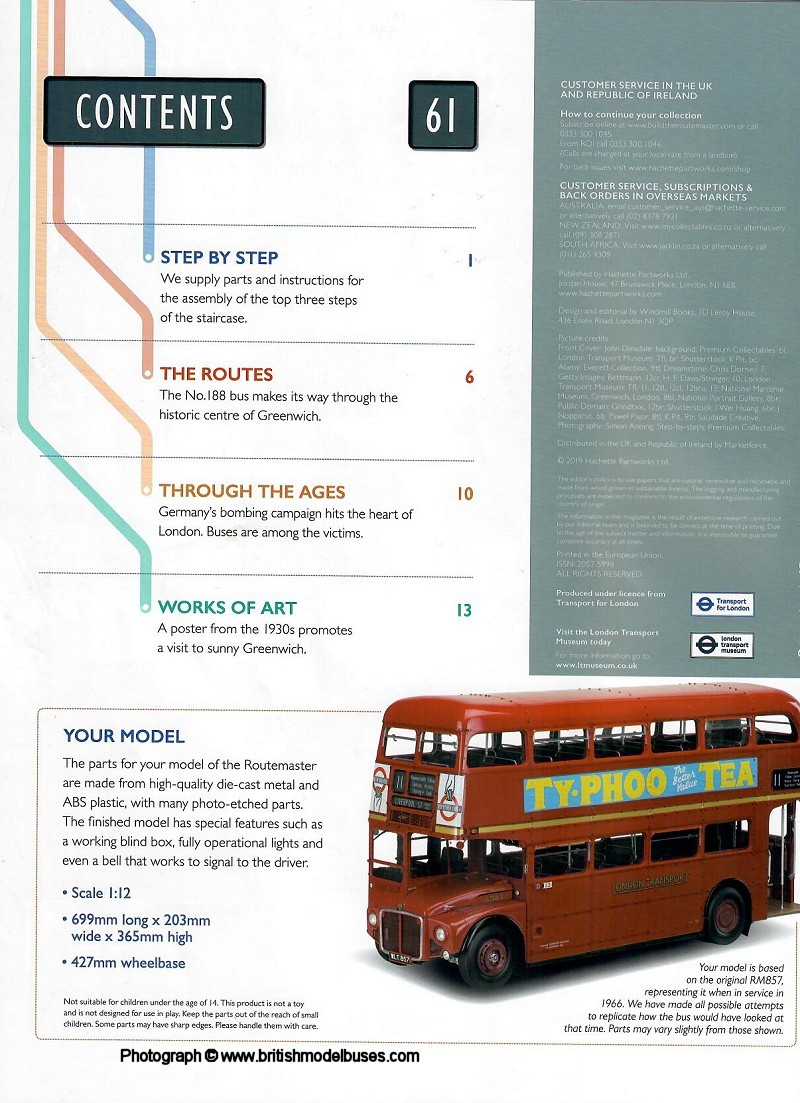
ISSUE 61 - ASSEMBLING THE TOP THREE STEPS |
|
|
|
|
|
|
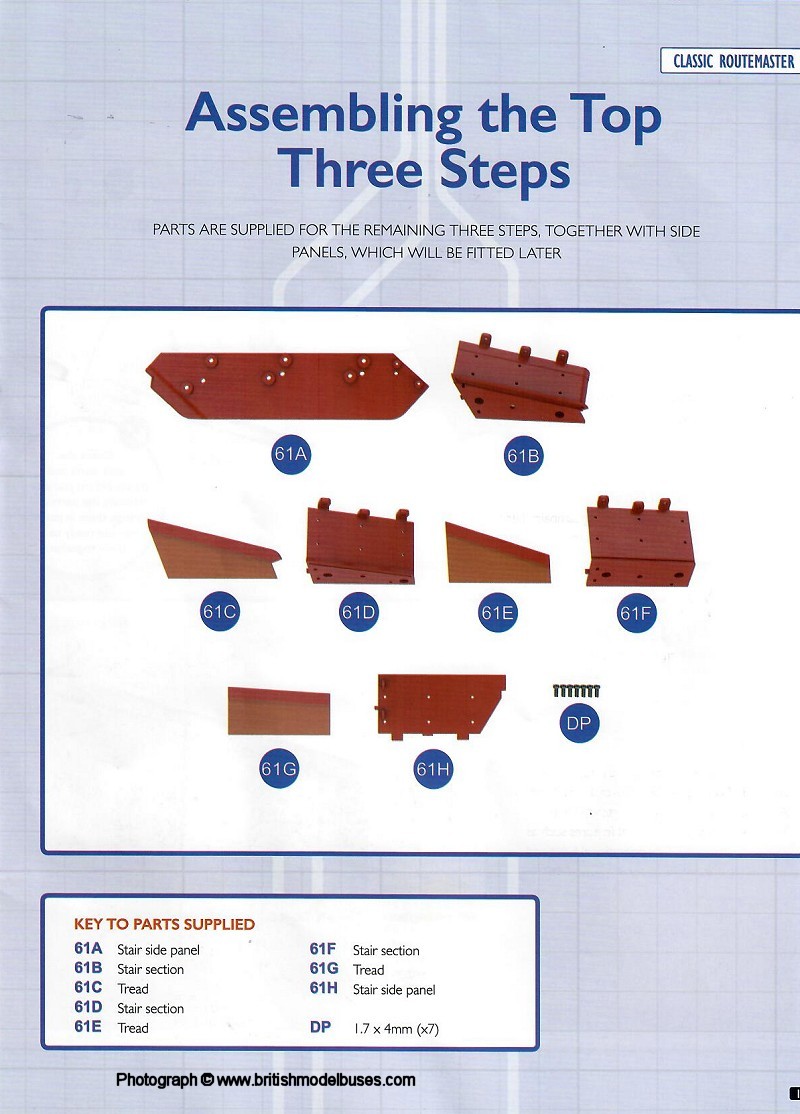
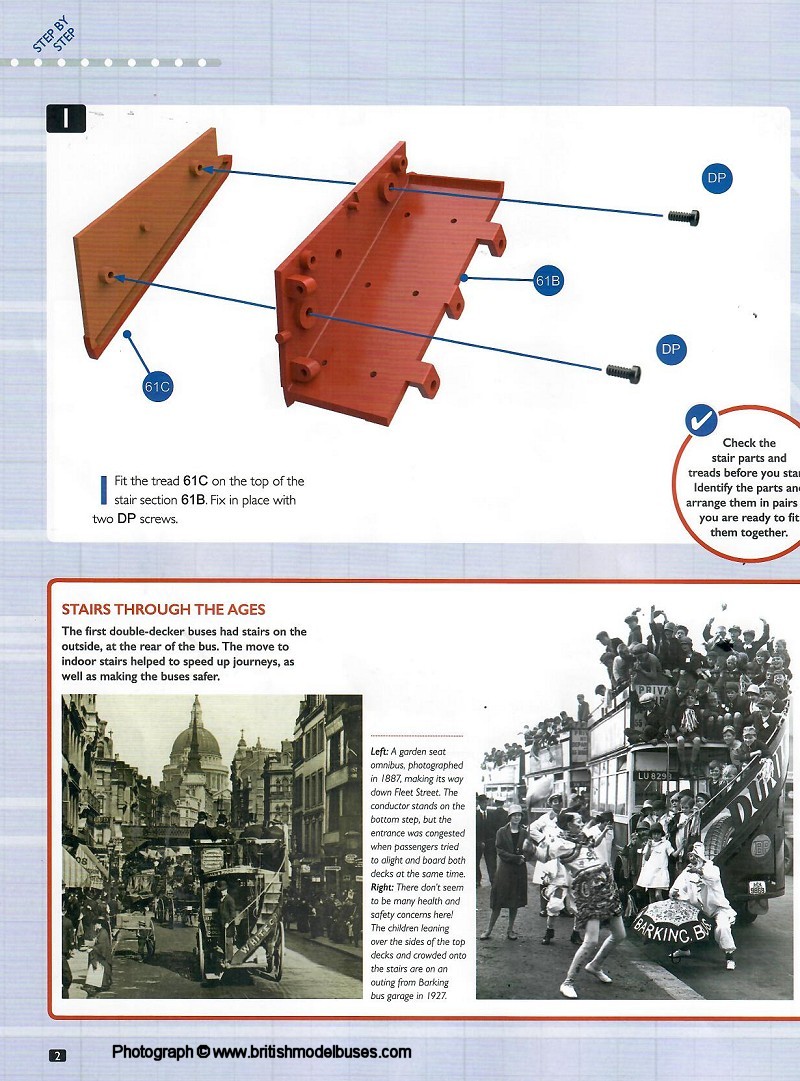
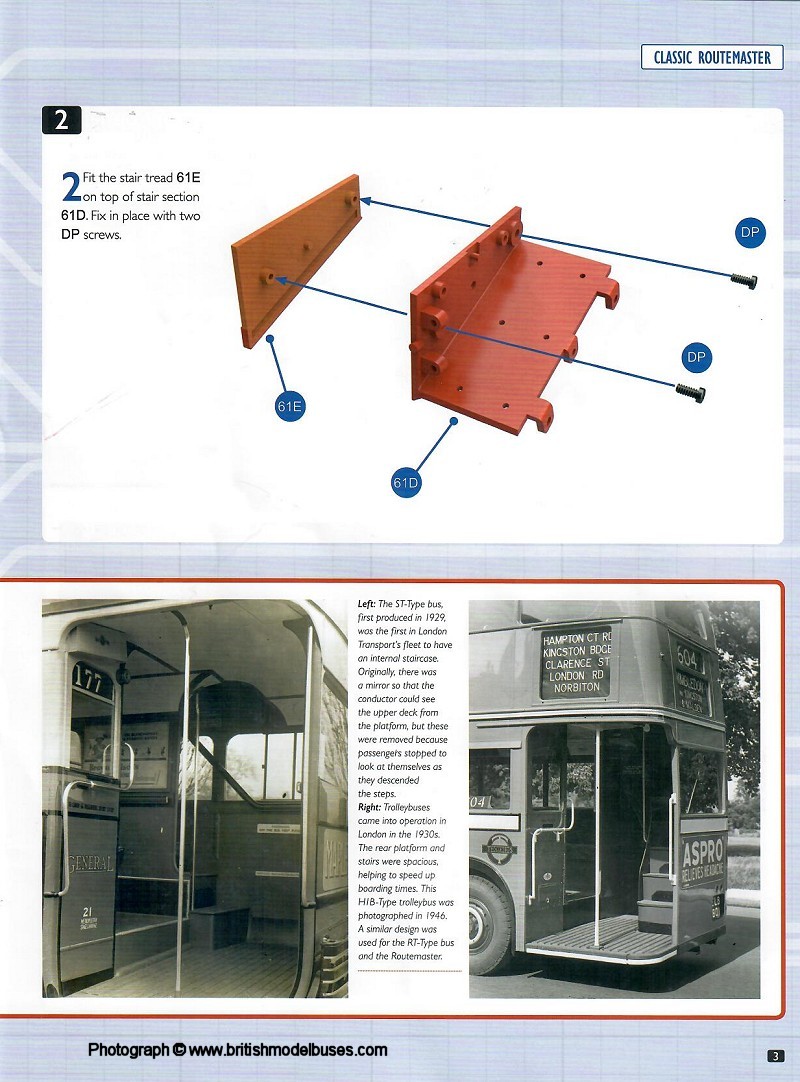
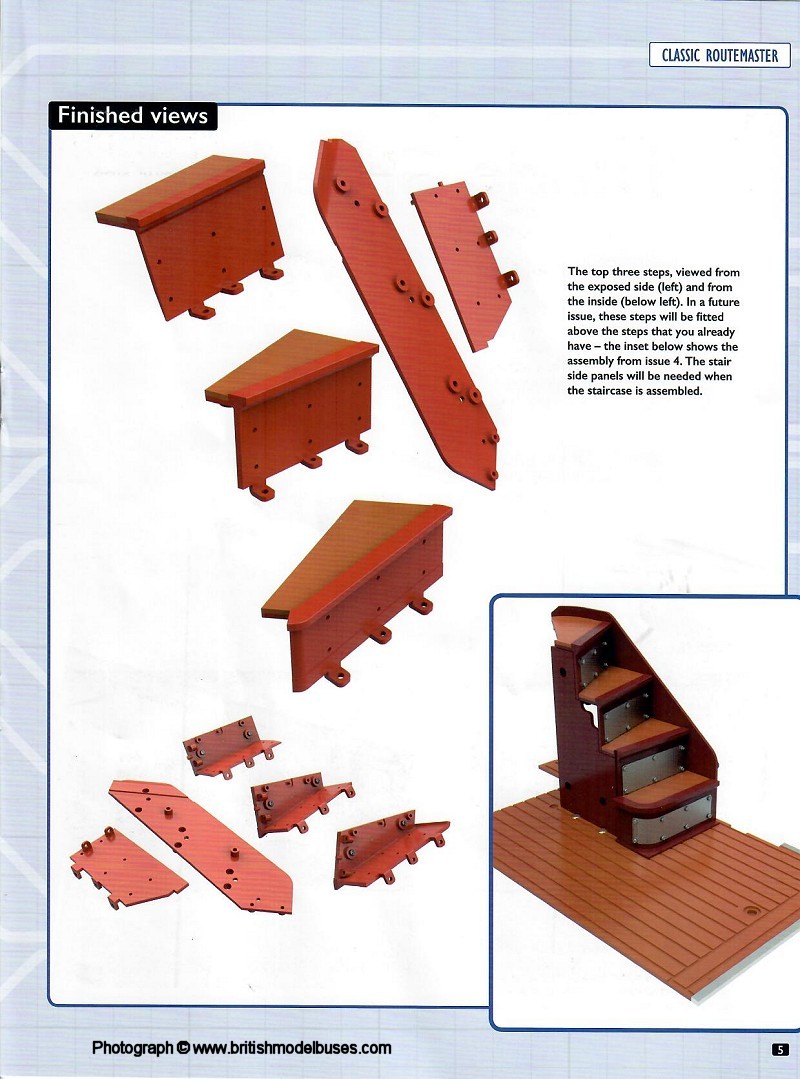
INSTRUCTIONS ISSUE 61 - ASSEMBLING THE TOP THREE STEPS |
|
|
|

|
|
|
BUILD ISSUE 61 - ASSEMBLING THE TOP THREE STEPS |

|

|
|
|
|
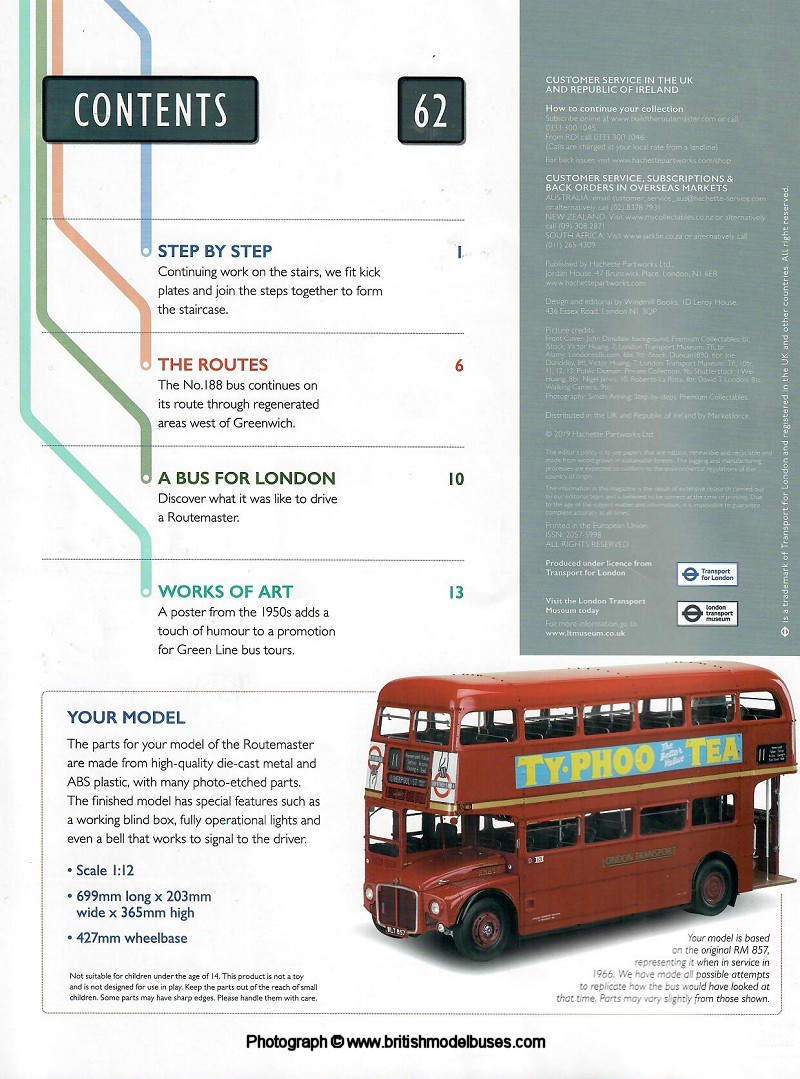
MAGAZINE
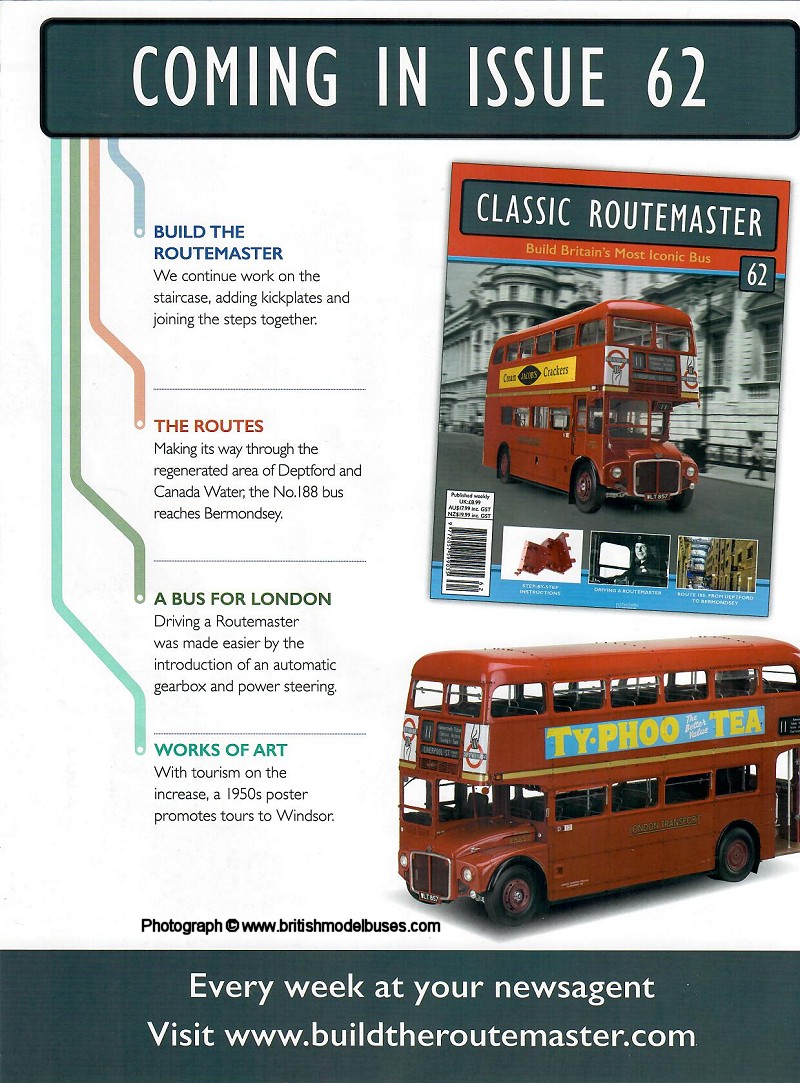
ISSUE 62 - KICK PLATES AND STAIRWAY ASSEMBLY |
|
|
|
|
|
|
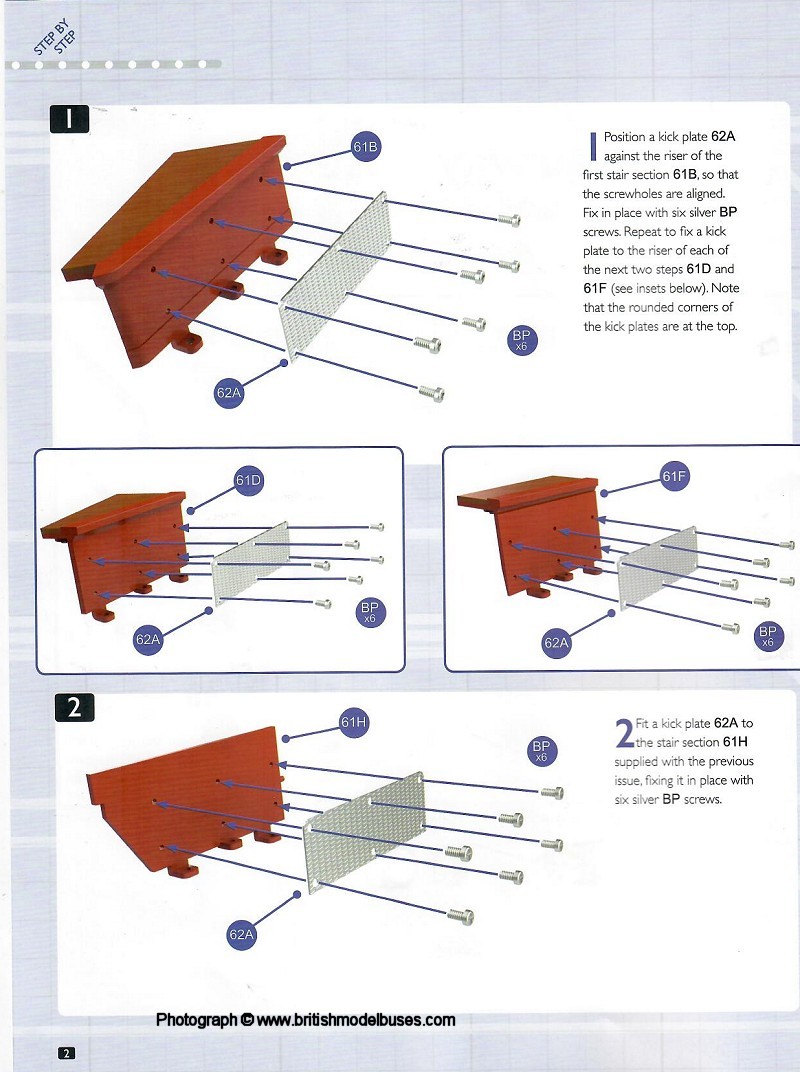
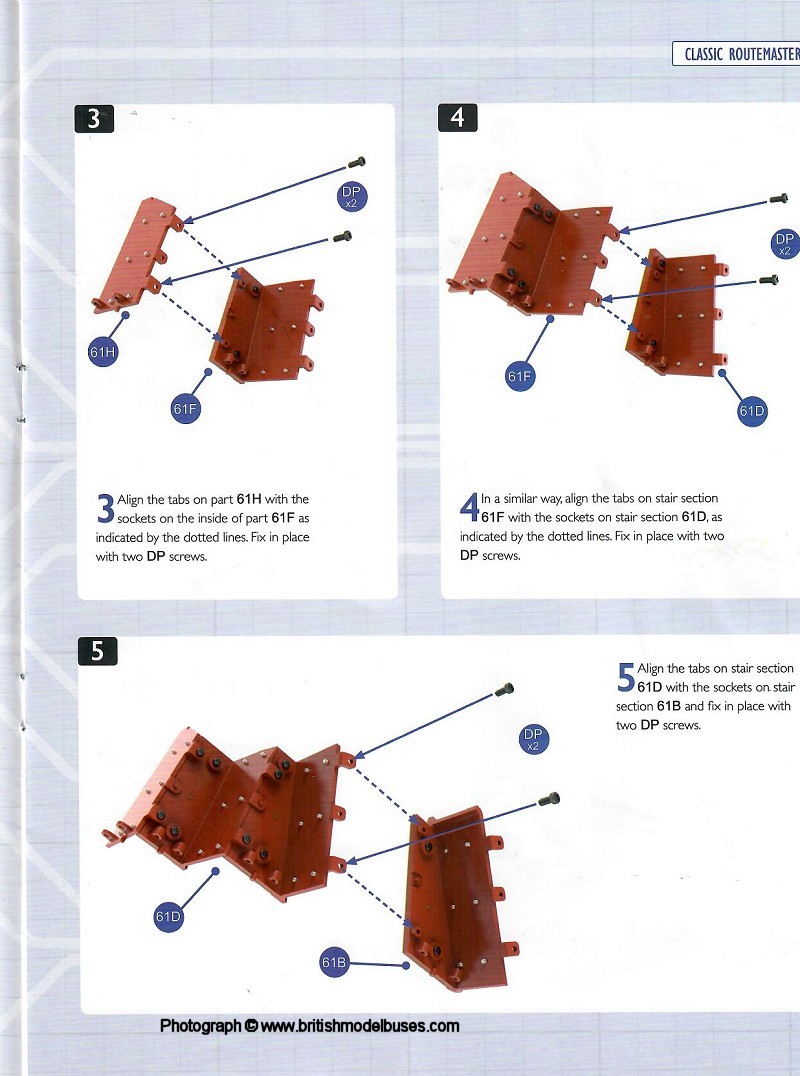
INSTRUCTIONS ISSUE 62 - KICK PLATES AND STAIRWAY ASSEMBLY |

|
|
|
|

|
|
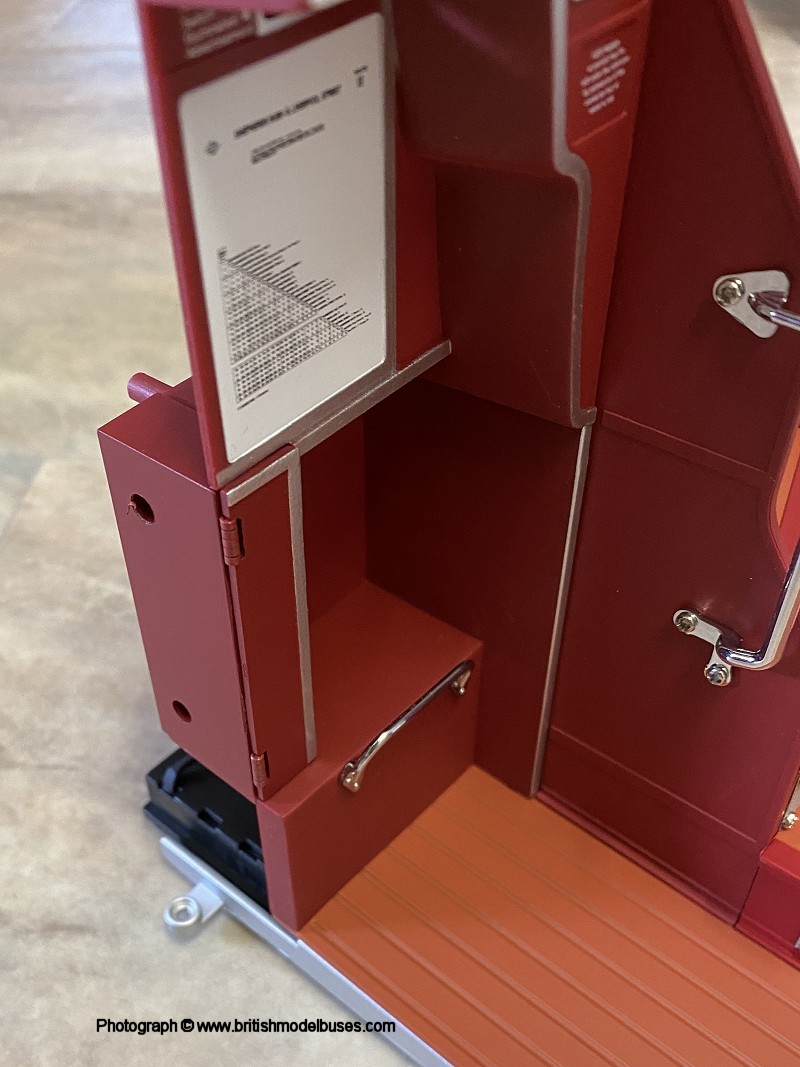
BUILD ISSUE 62 - KICK PLATES AND STAIRWAY ASSEMBLY |
|
|

|

|
|
|
|
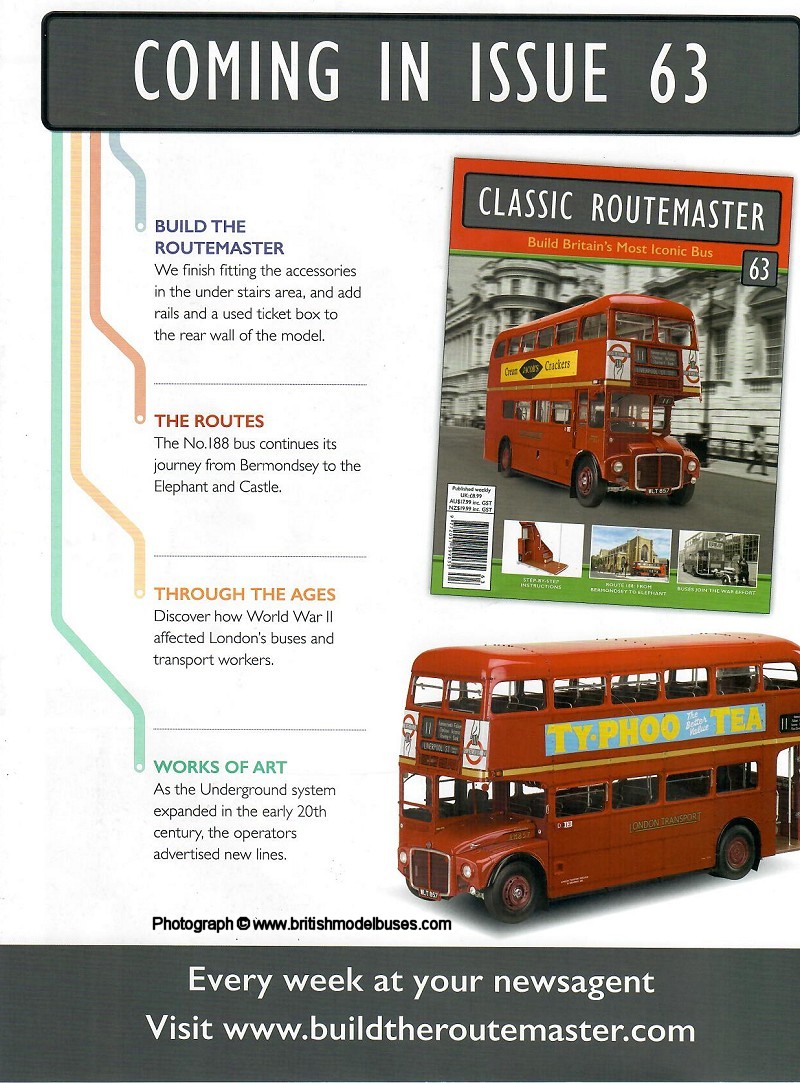
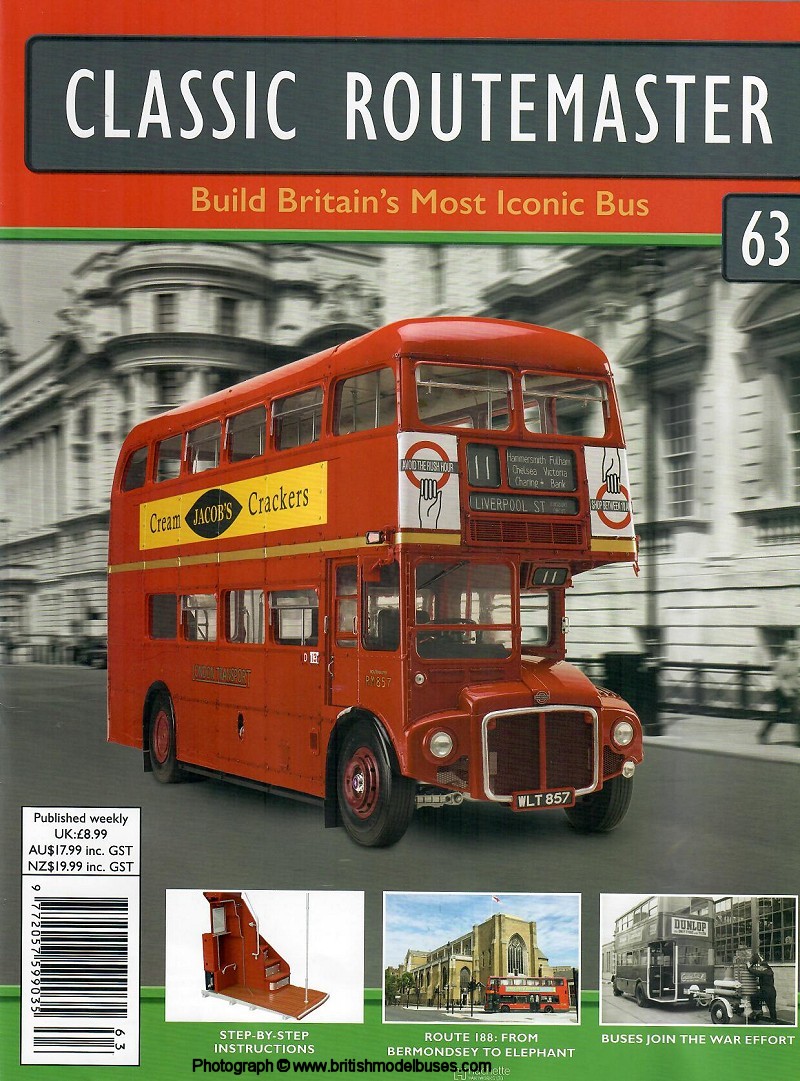
MAGAZINE
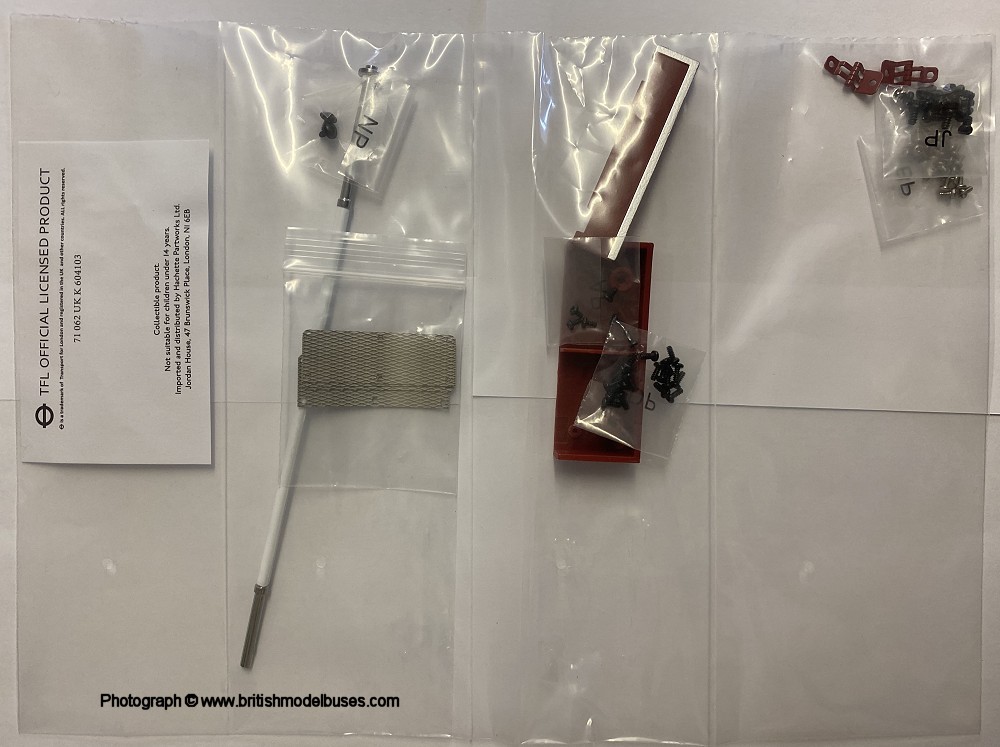
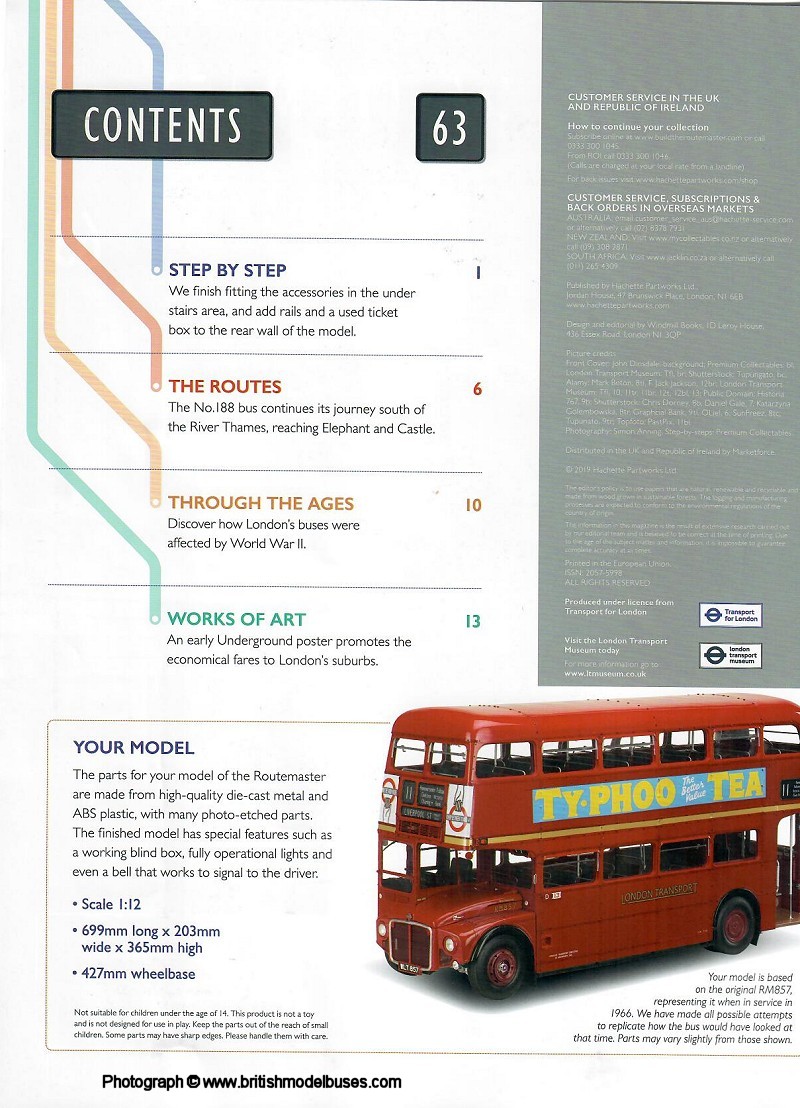
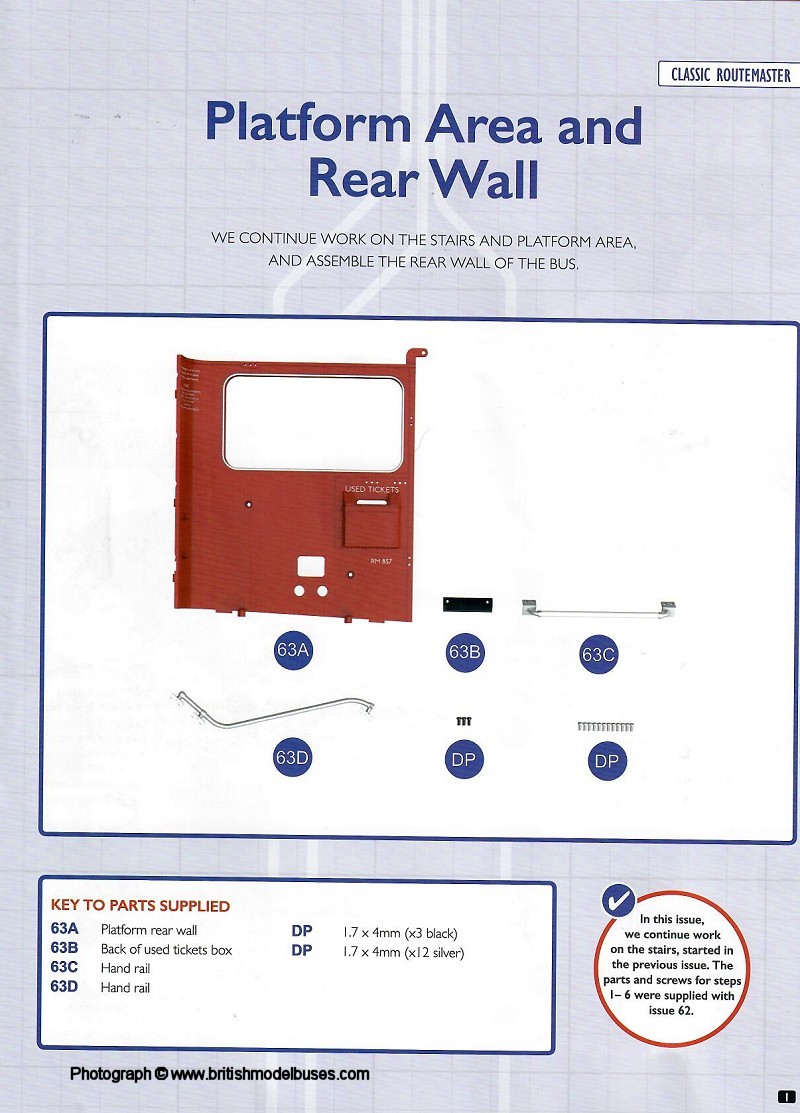
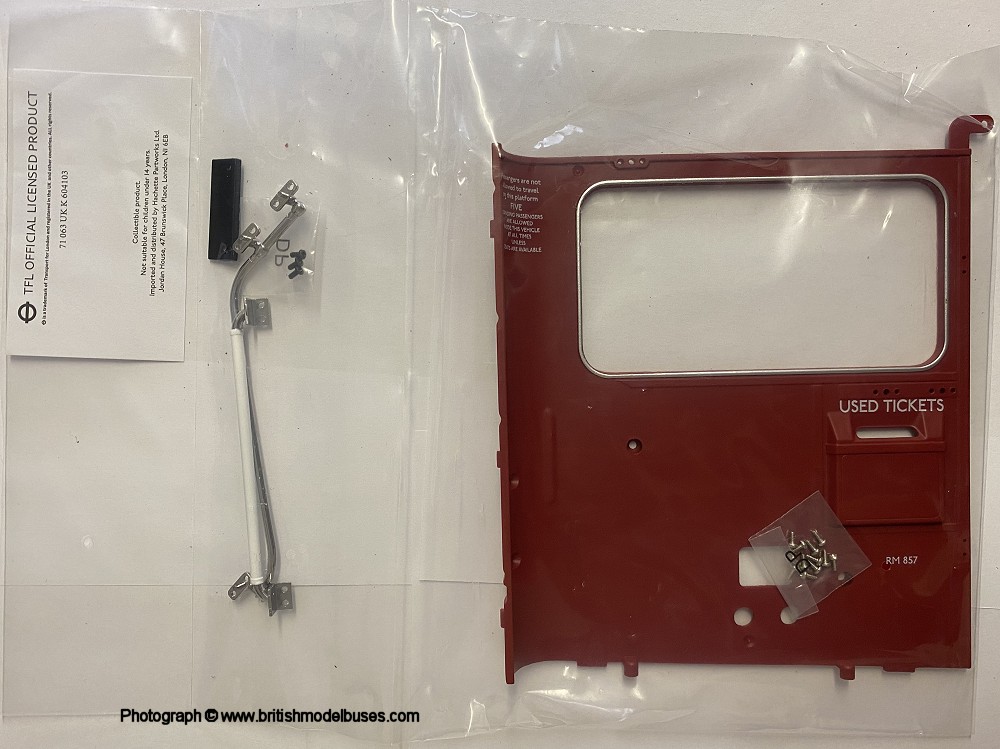
ISSUE 63 - PLATFORM AREA AND REAR WALL |
|
|
|
|

|
|
|
|
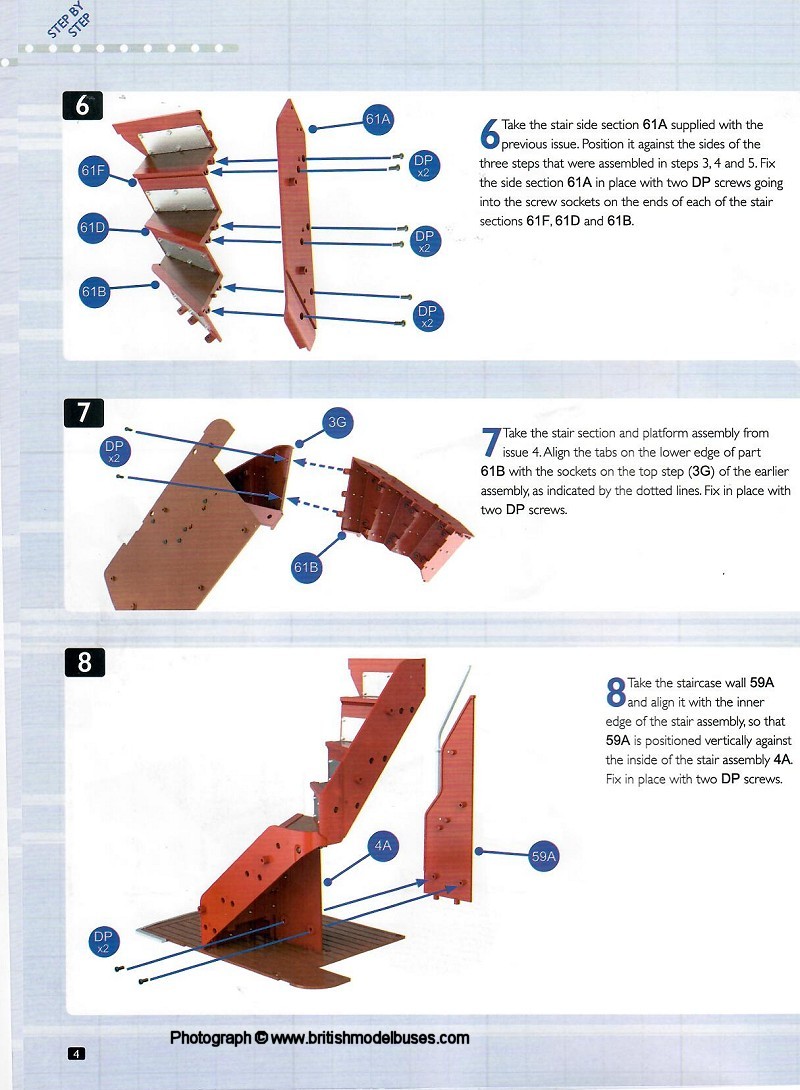
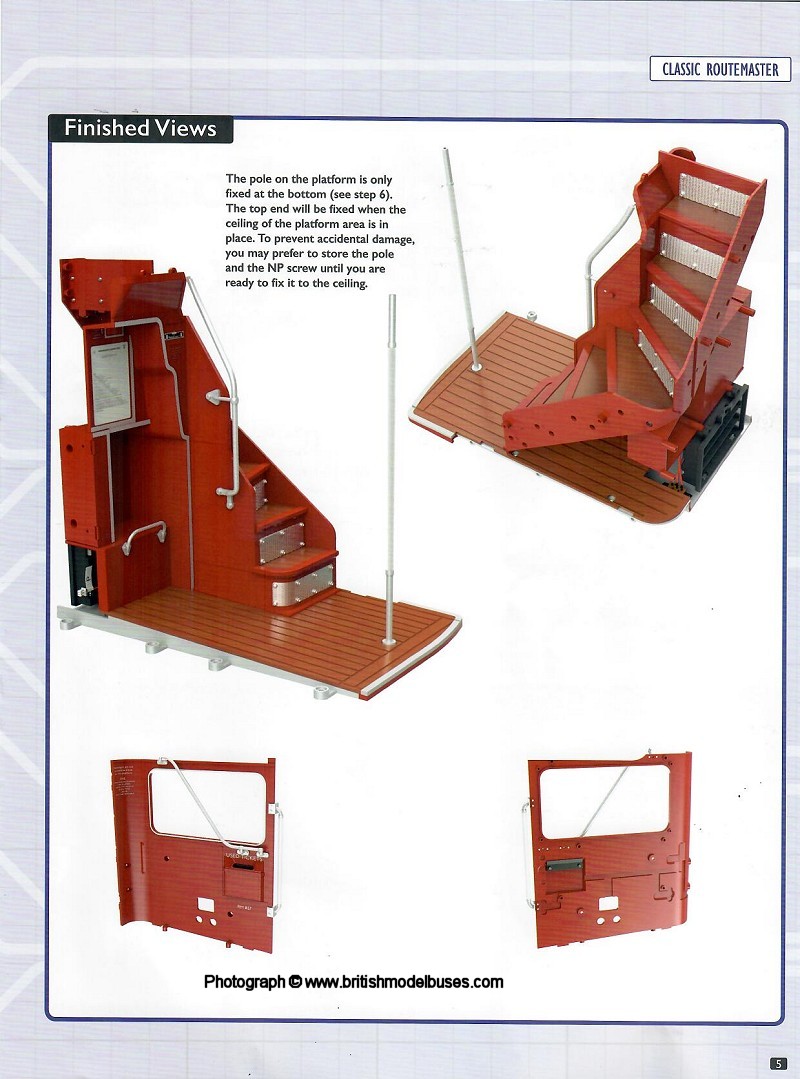
INSTRUCTIONS ISSUE 63 - PLATFORM AREA AND REAR WALL |
|
|

|
|
|
|
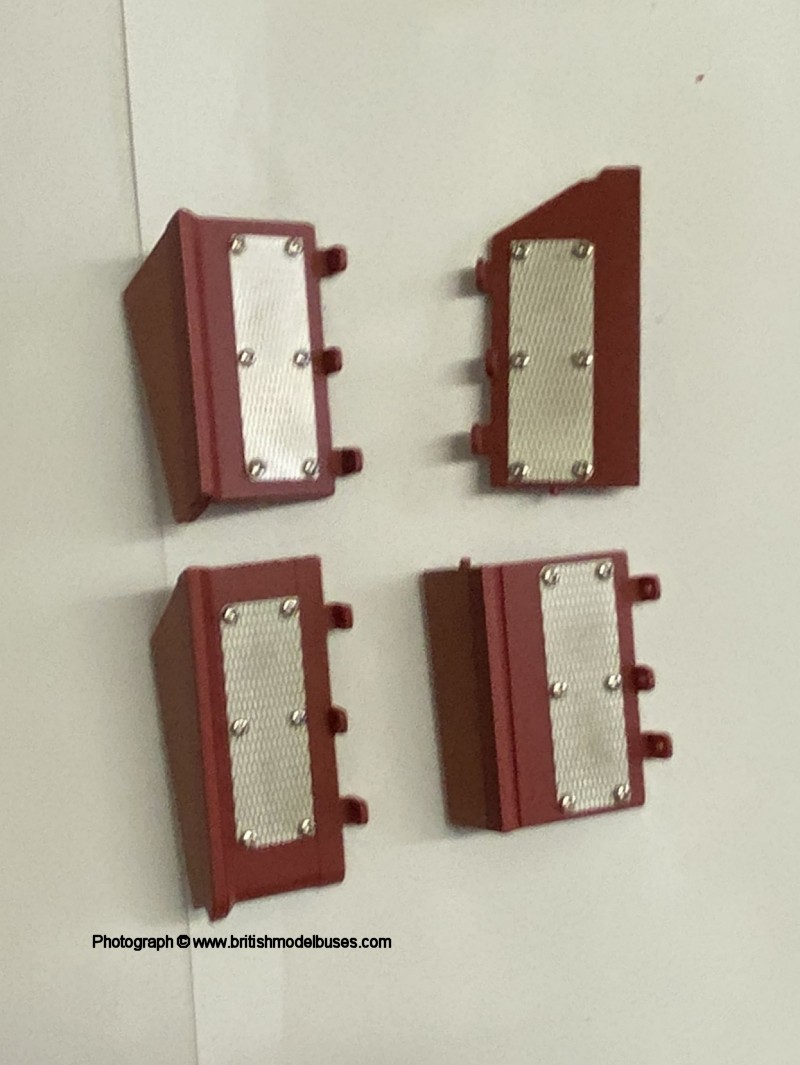
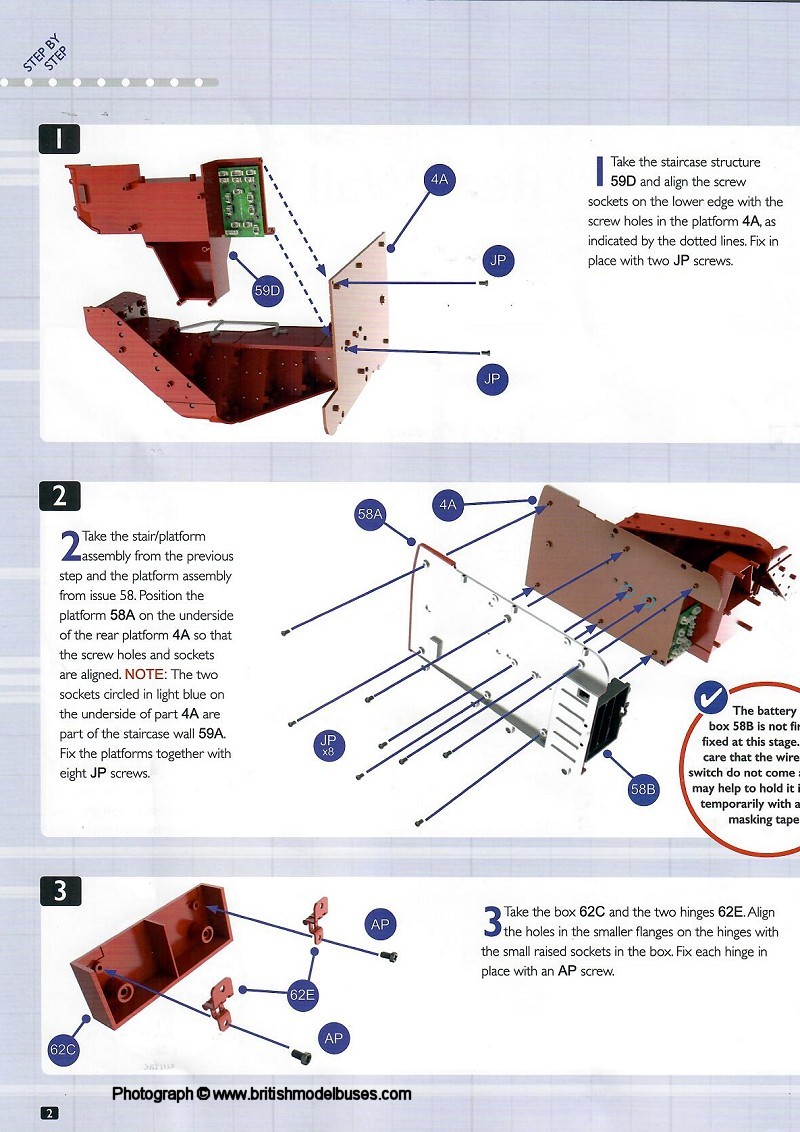
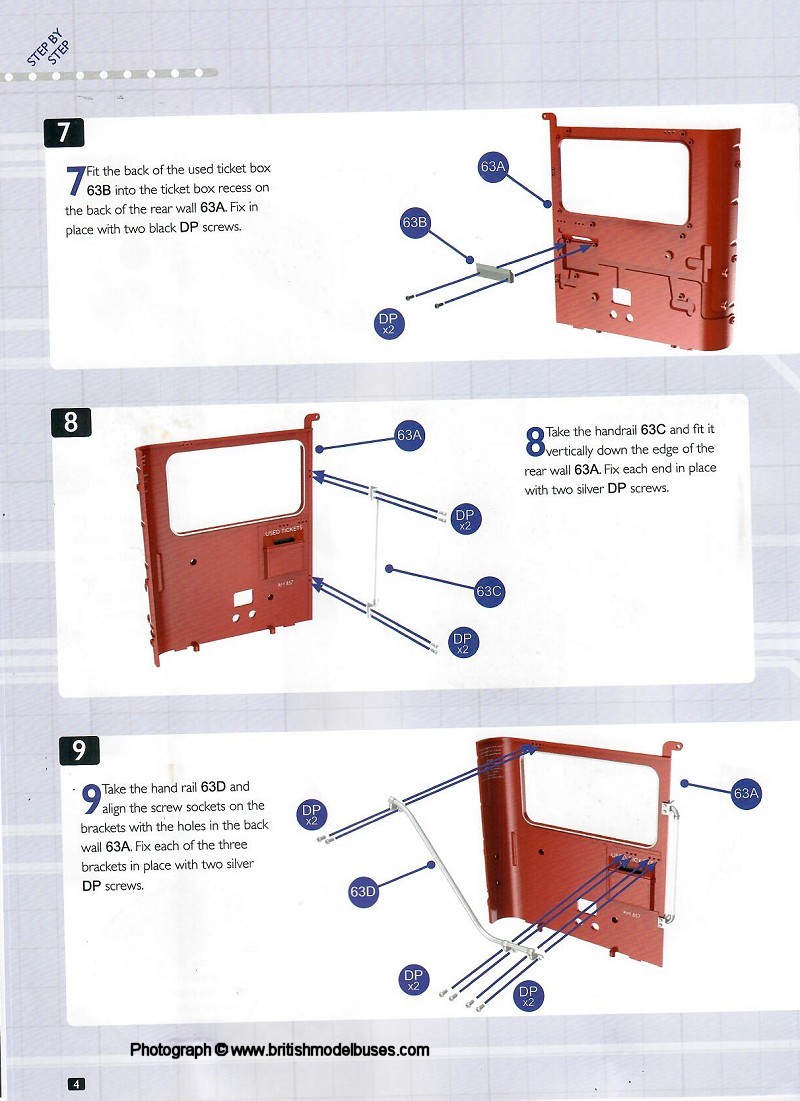
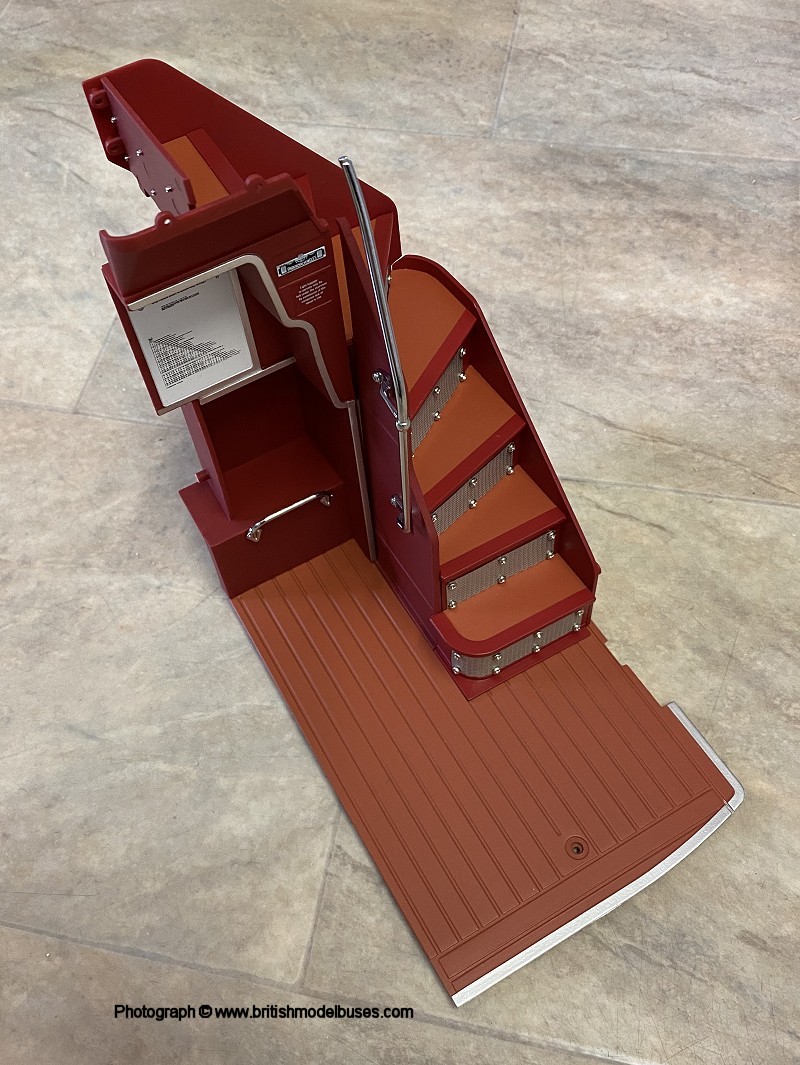
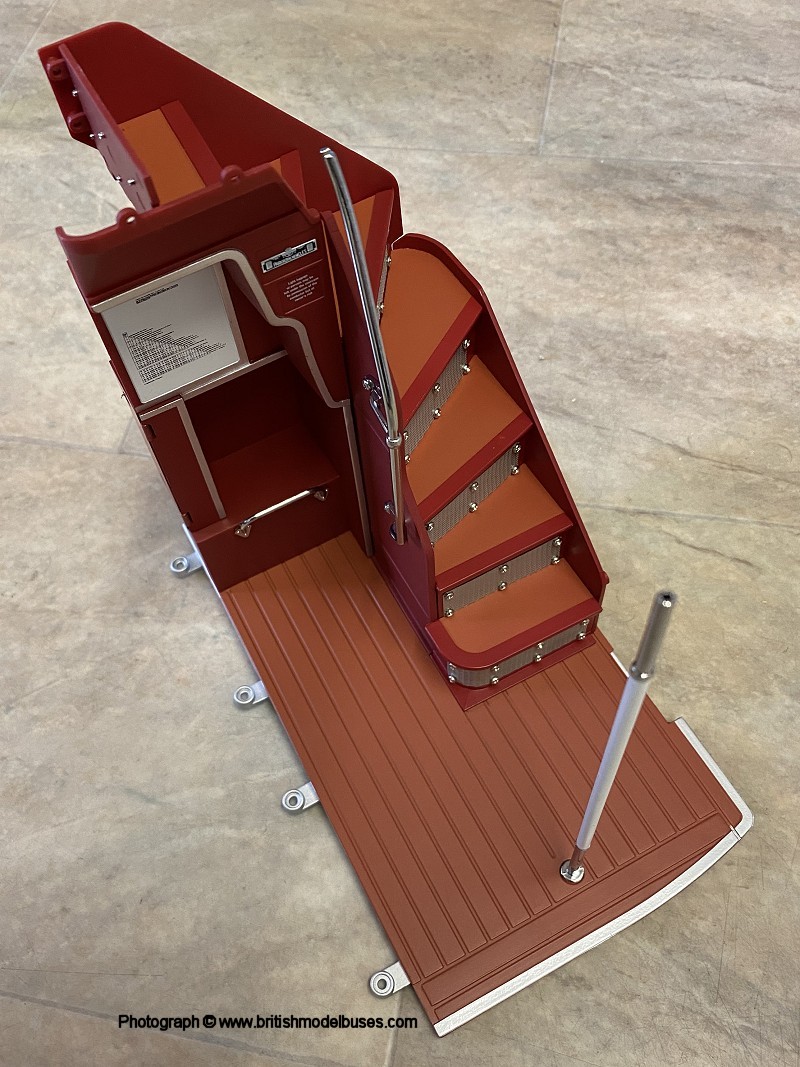
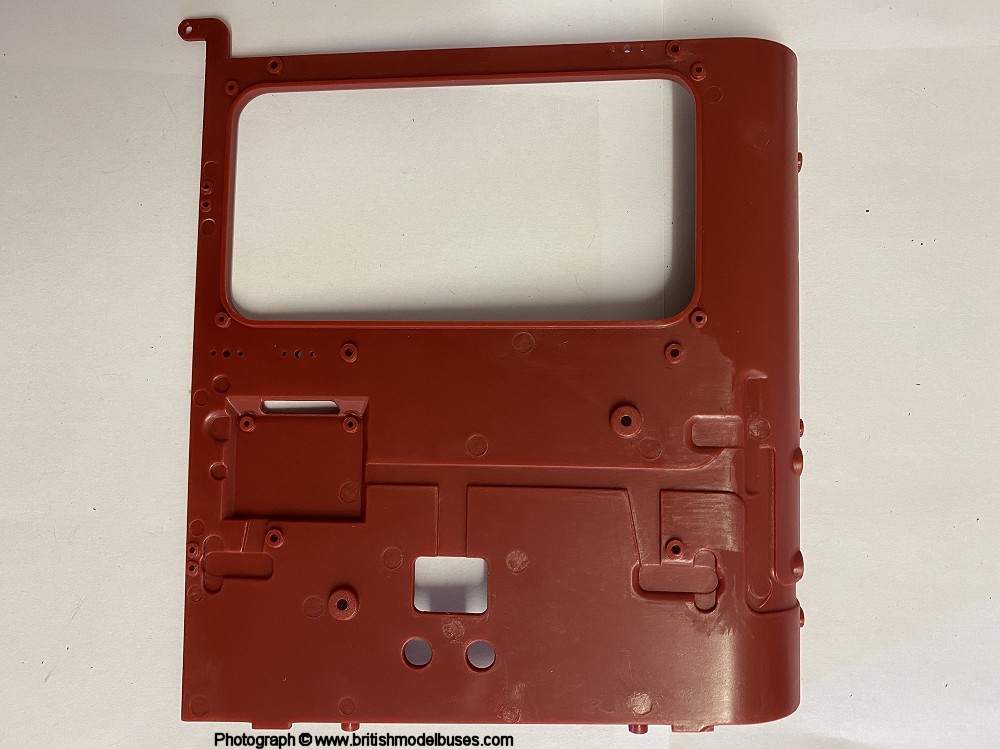
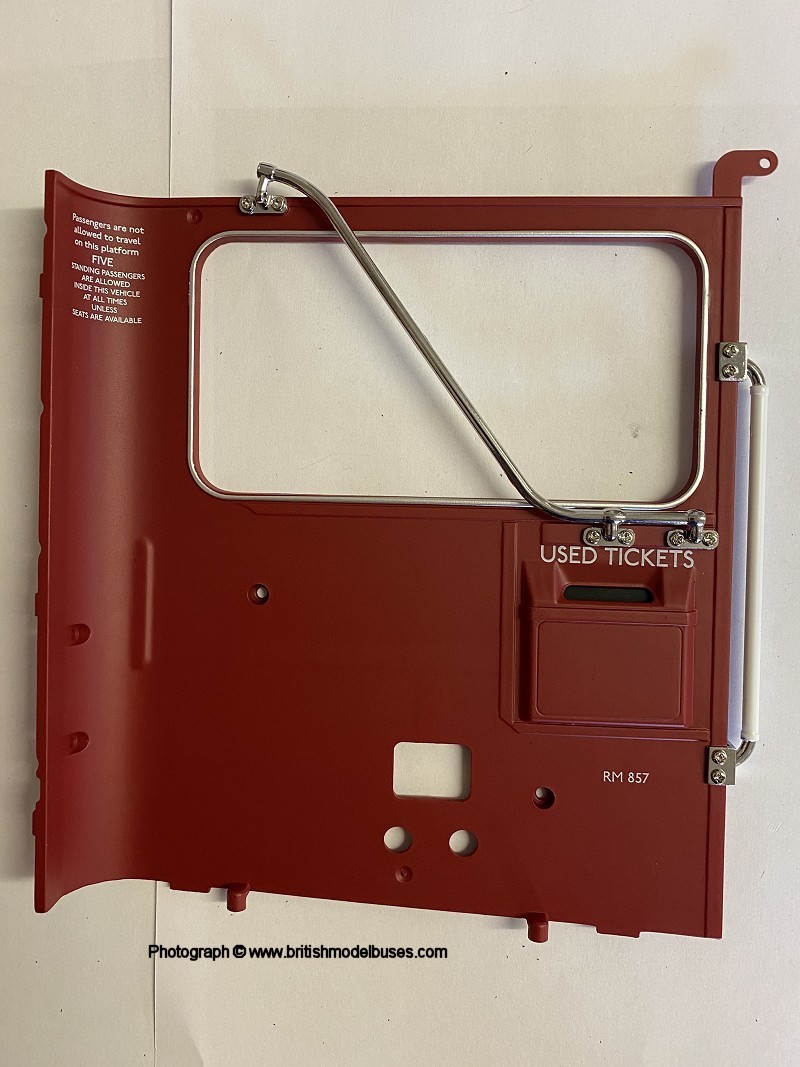
BUILD ISSUE 63 - PLATFORM AREA AND REAR WALL |
|
|

|

|

|
|
|
|
|
|

|
|
|
|
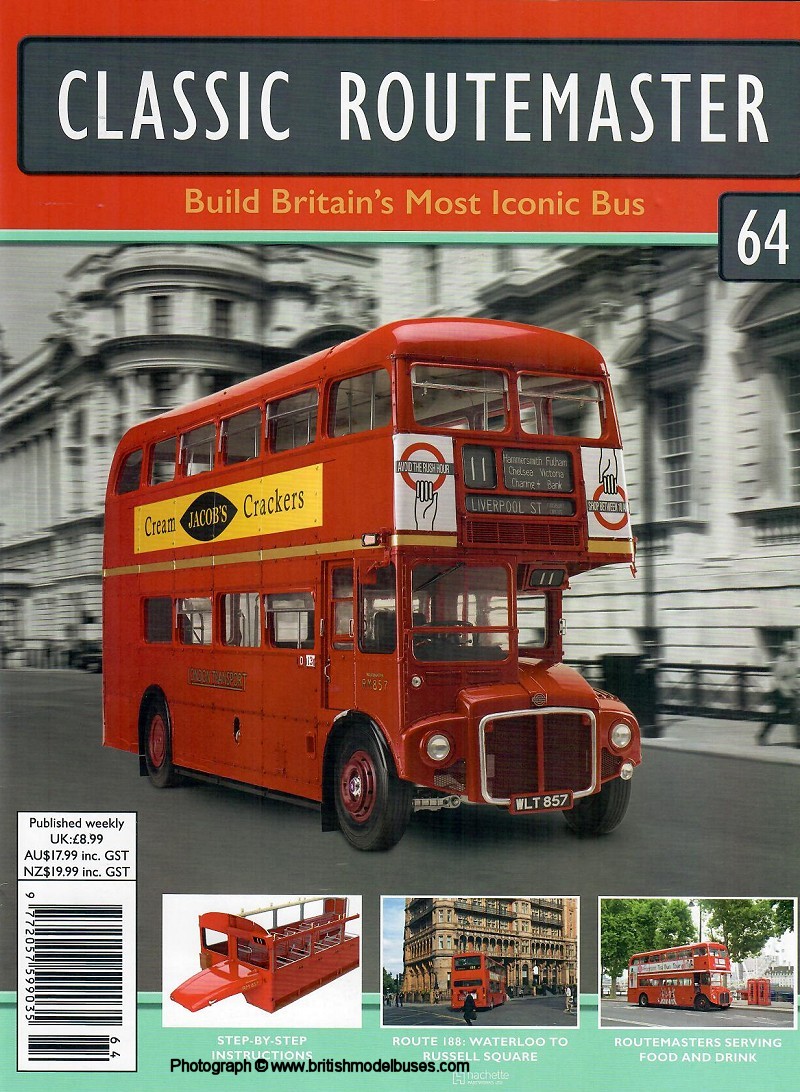
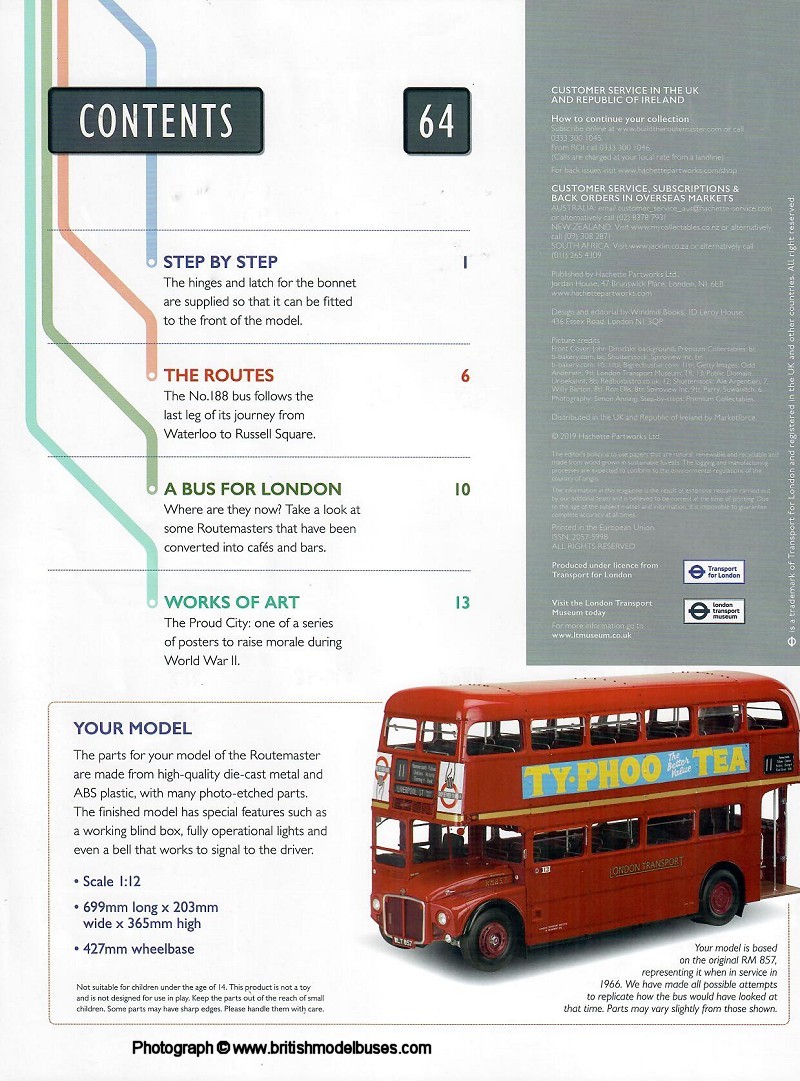
MAGAZINE
ISSUE 64 - FITTING THE BONNET |
|
|
|
|
|
|
|
|
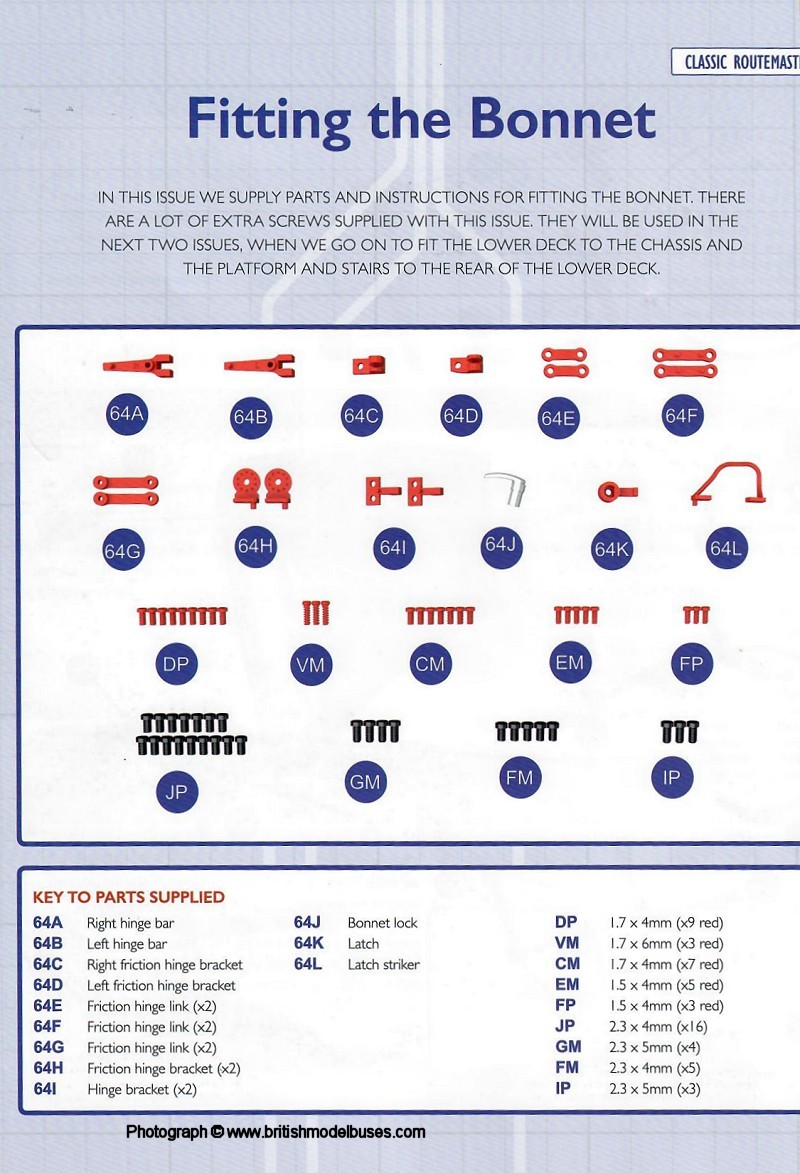
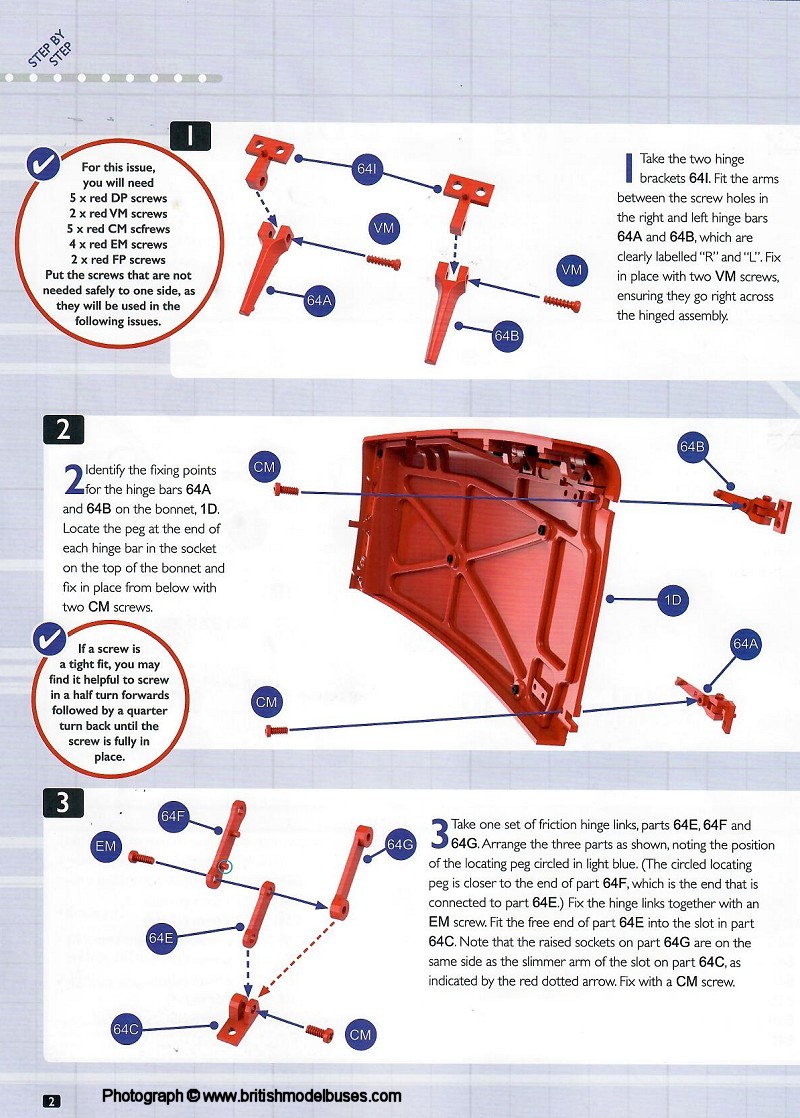
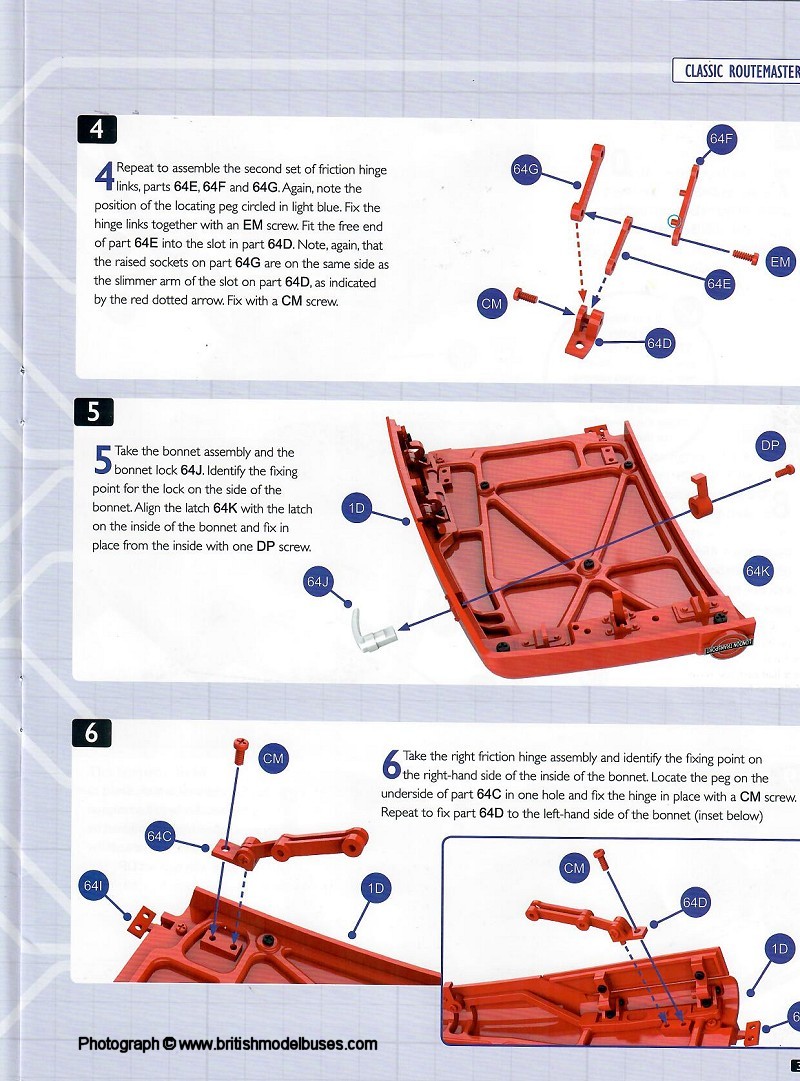
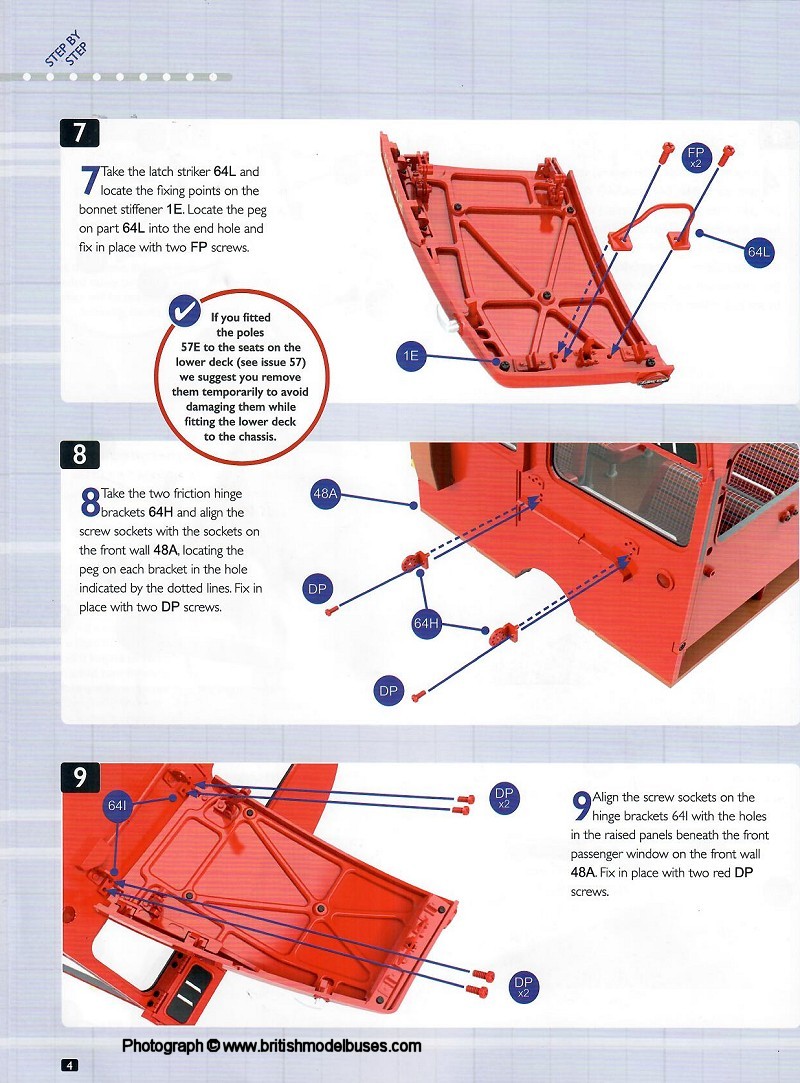
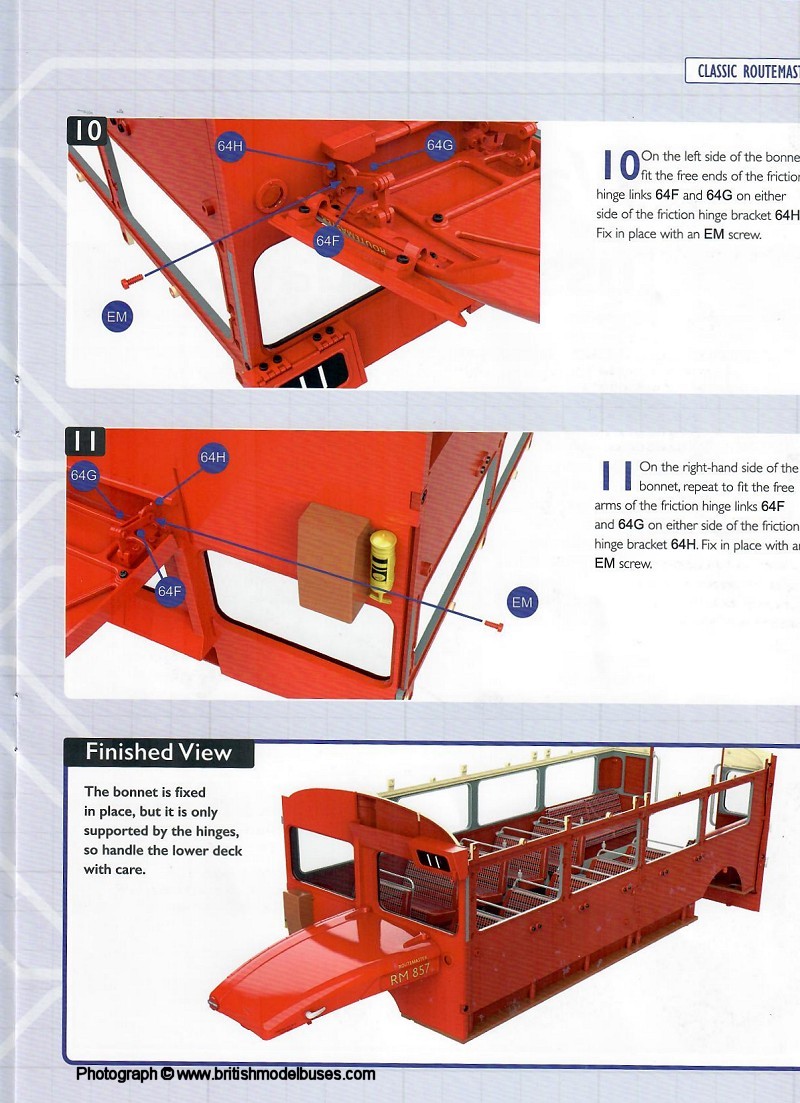
INSTRUCTIONS ISSUE 64 - FITTING THE BONNET |
|
|
|
|
|
|
|
|
BUILD ISSUE 64 - FITTING THE BONNET |

|
|
|
|
|
|
|
|
|
|
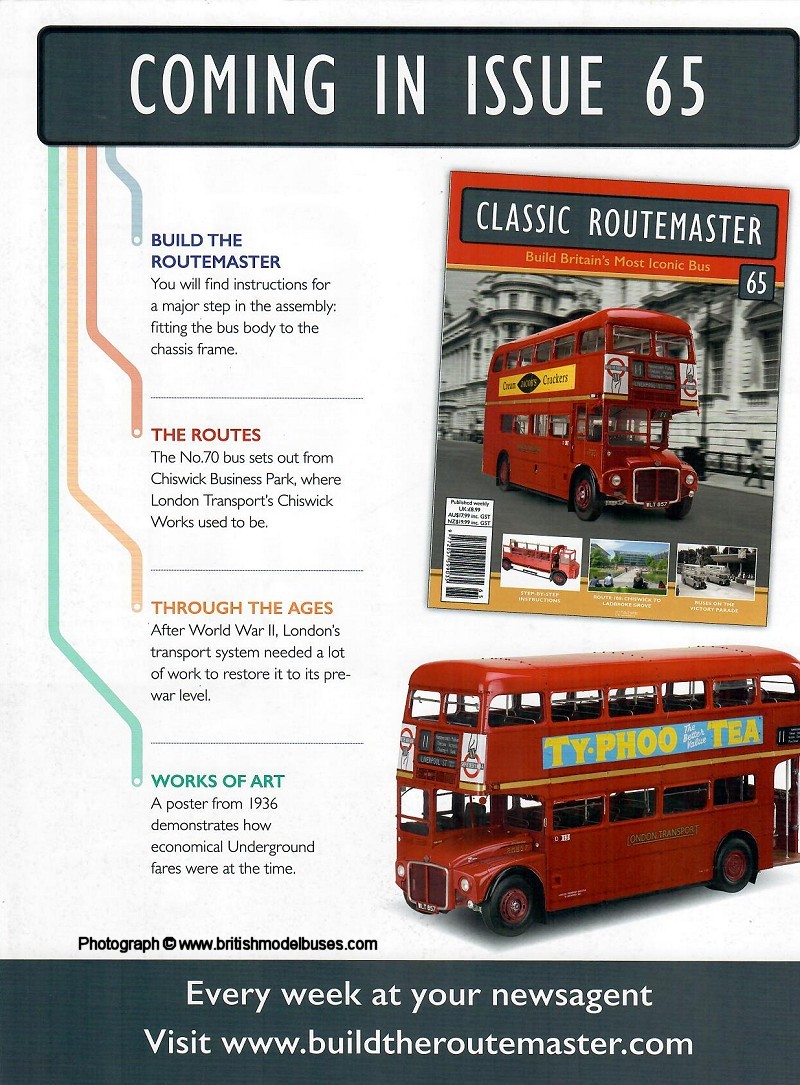
MAGAZINE
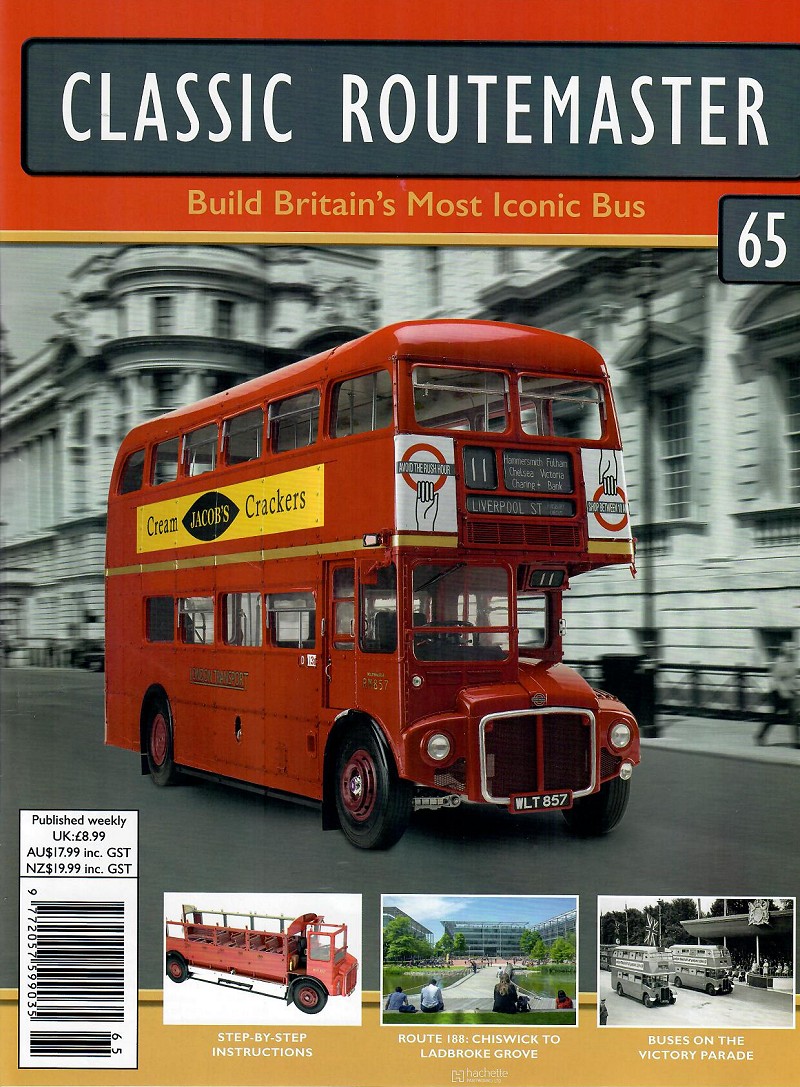
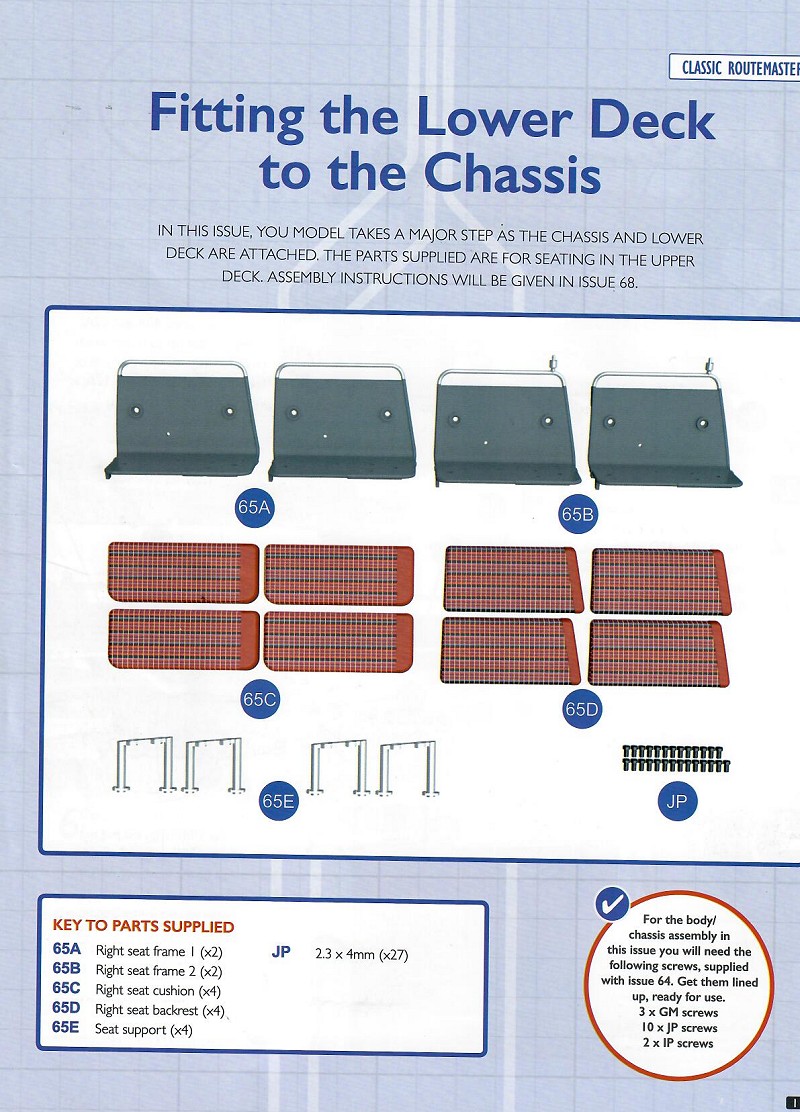
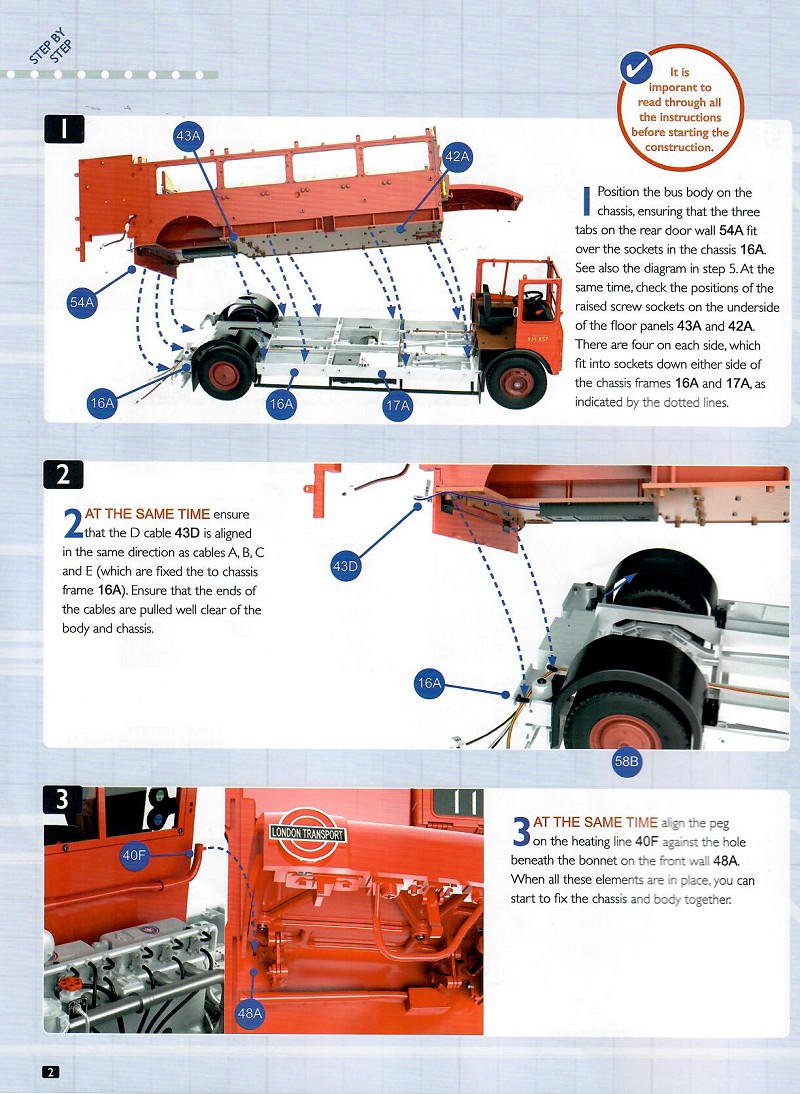
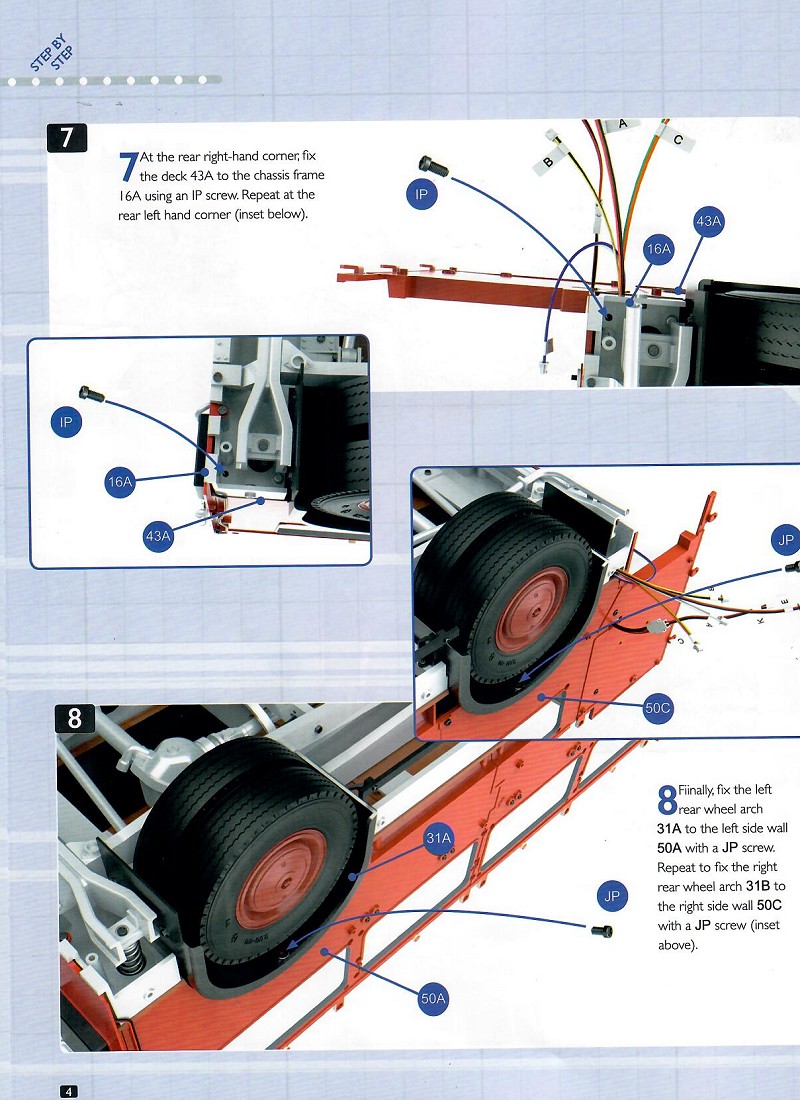
ISSUE 65 - FITTING THE LOWER DECK TO THE CHASSIS |
|
|
|

|
|
|
|
|
INSTRUCTIONS ISSUE 65 - FITTING THE LOWER DECK TO THE CHASSIS |
|
|

|
|

|
|
|
|
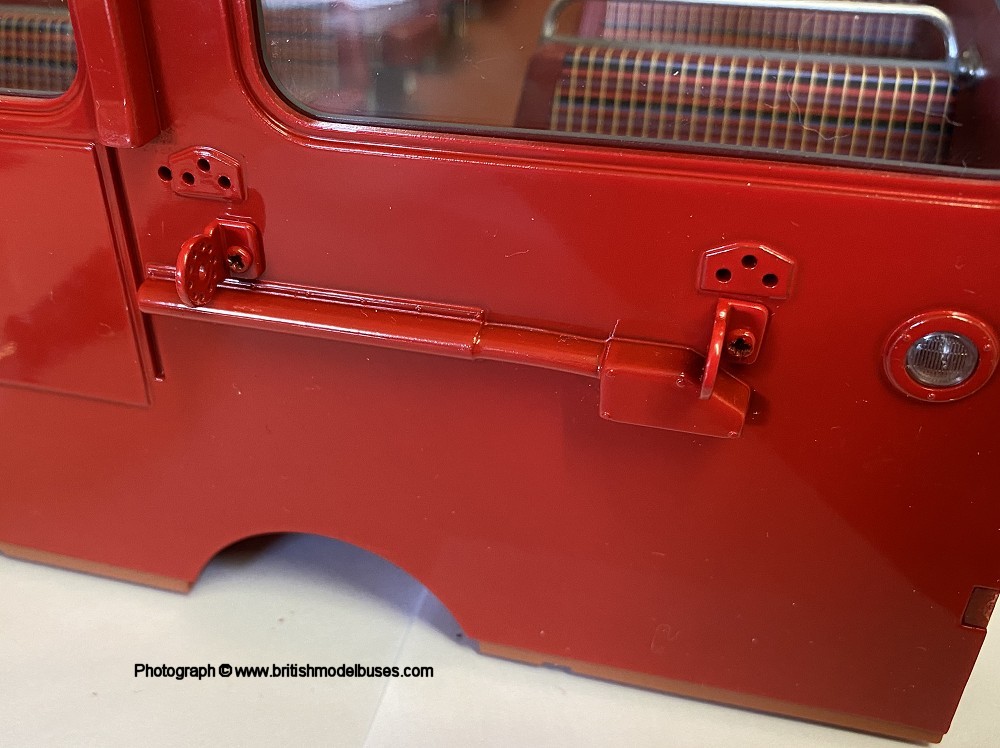
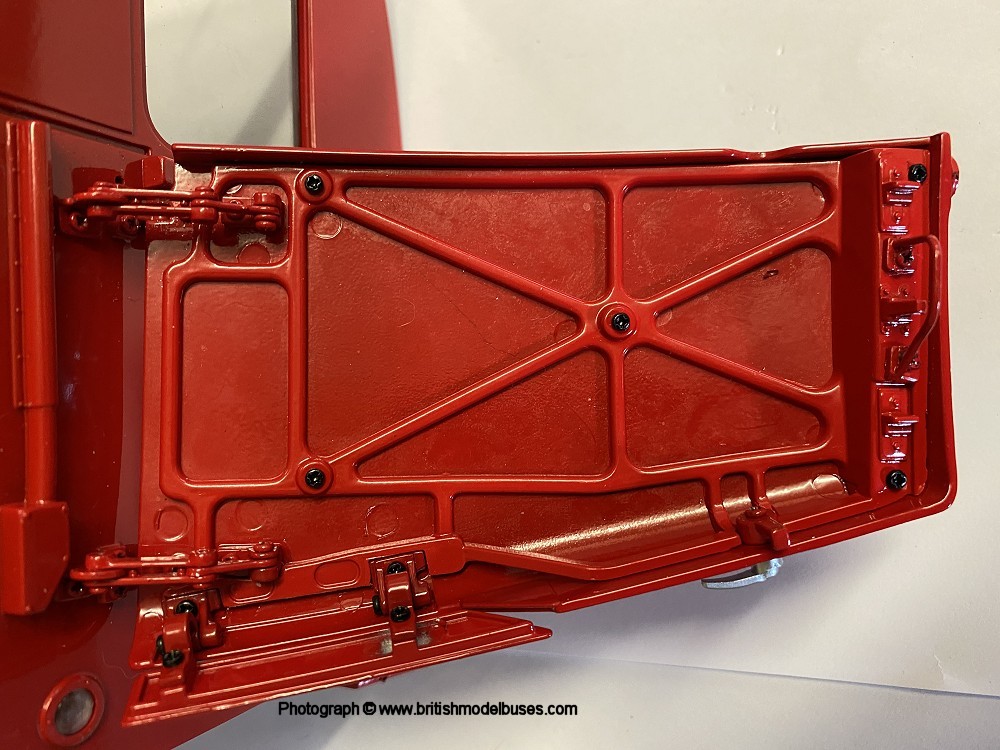
BUILD ISSUE 65 - FITTING THE LOWER DECK TO THE CHASSIS |

|

|
|
|
|
MAGAZINE
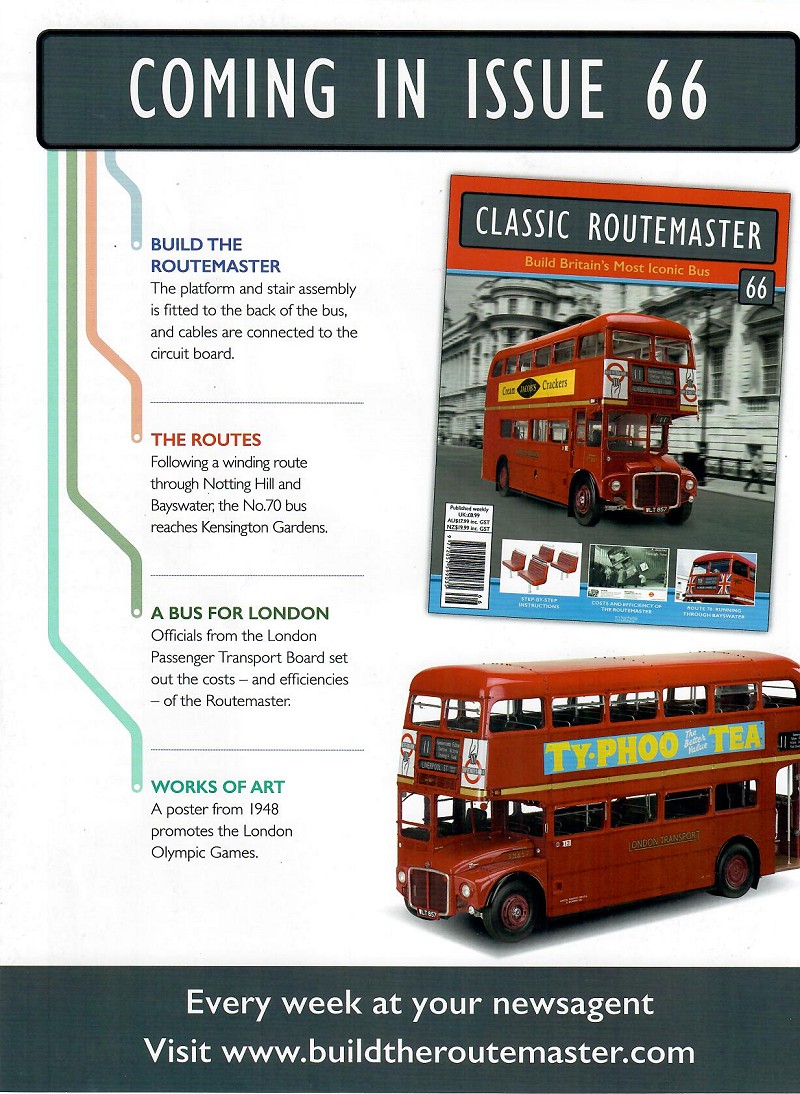
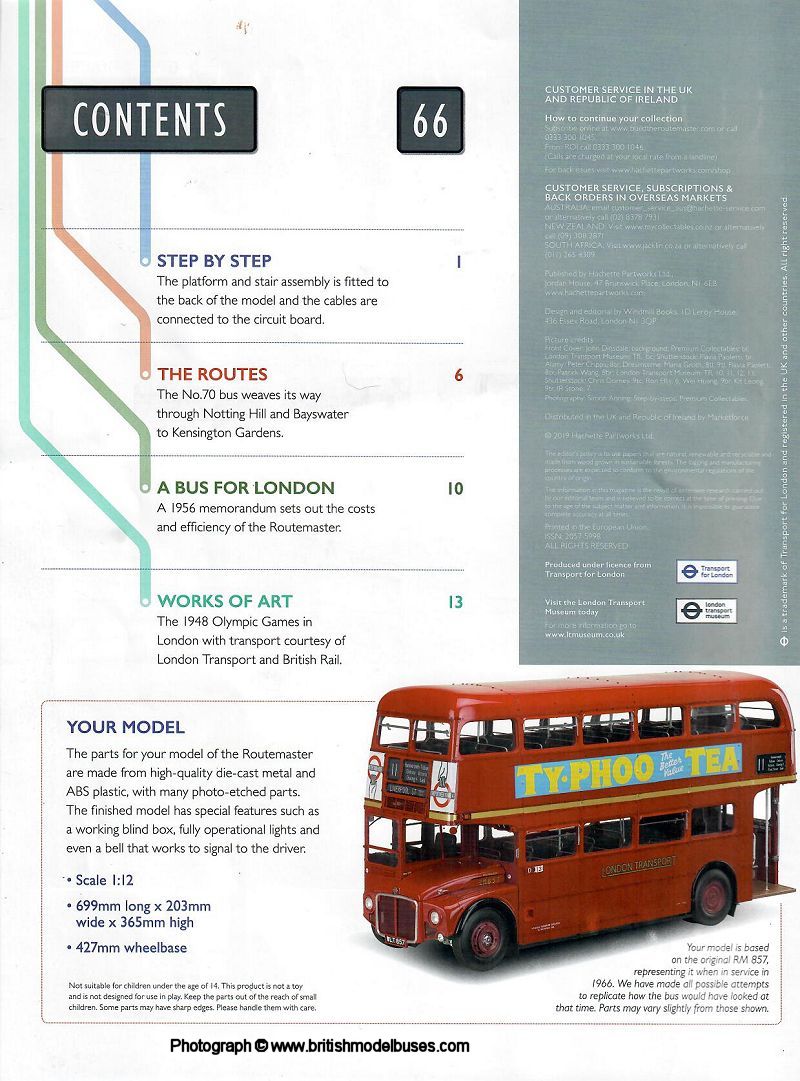
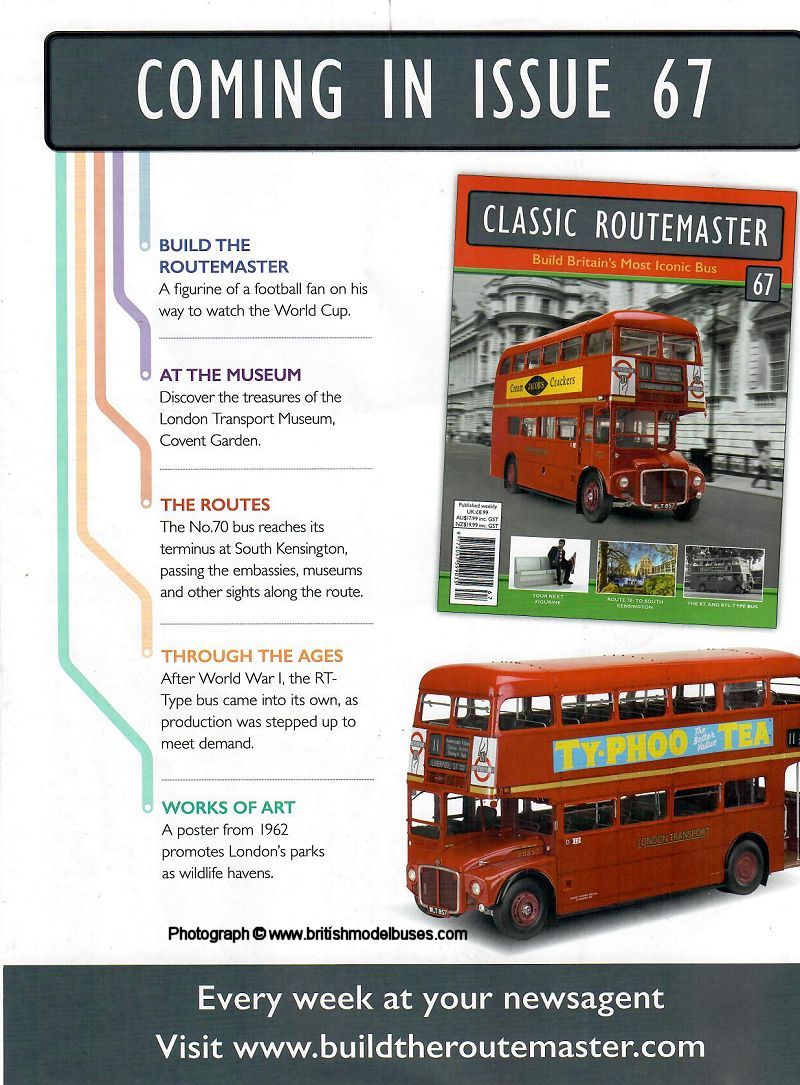
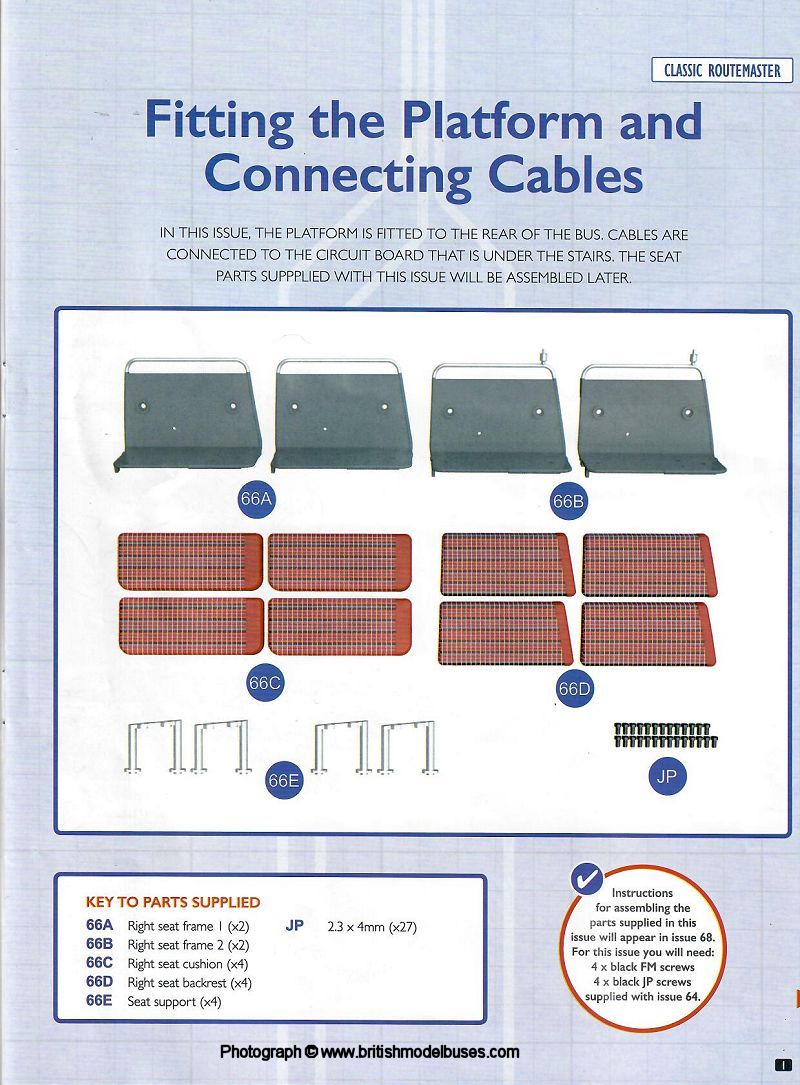
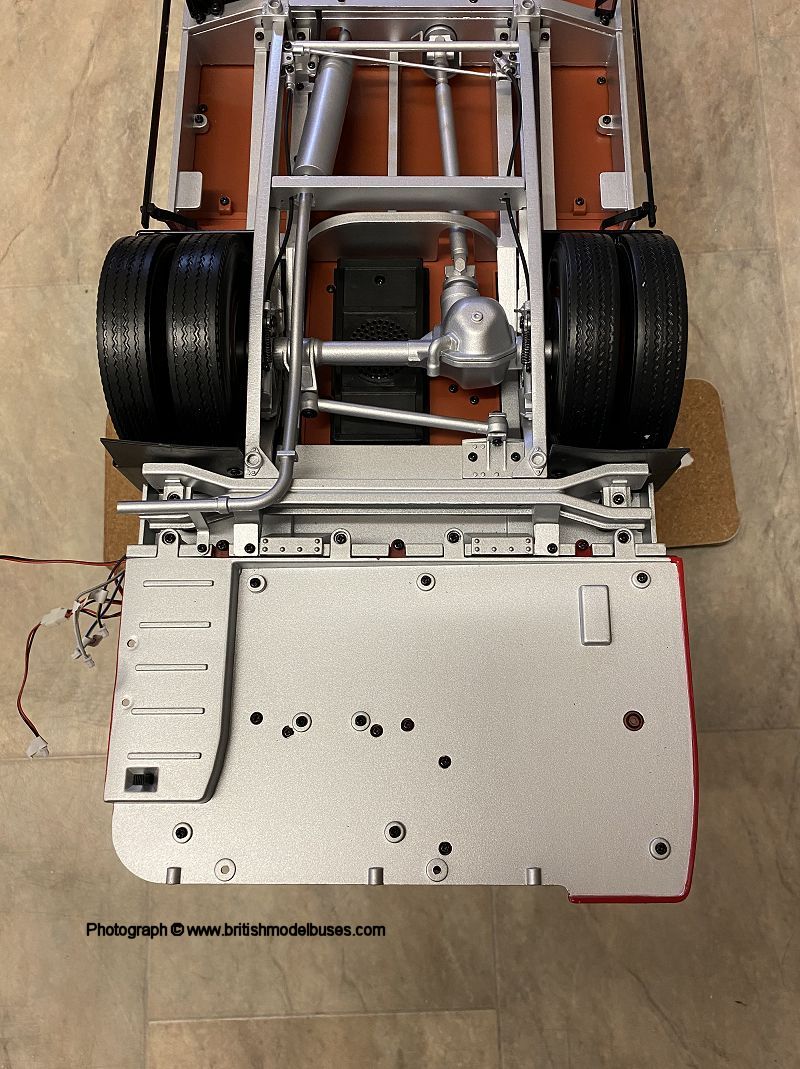
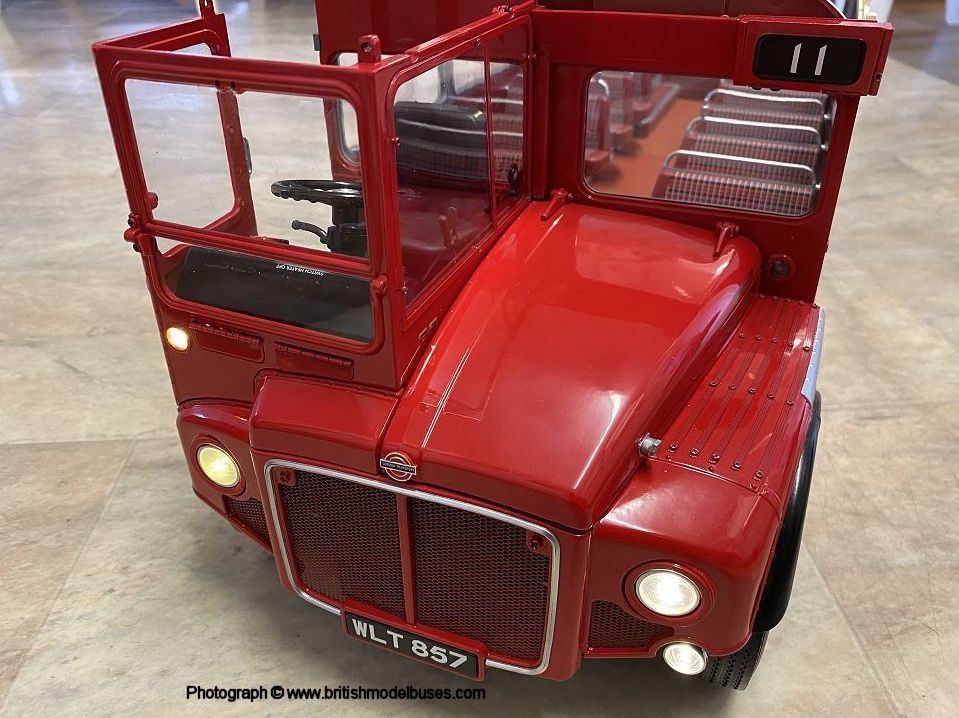
ISSUE 66 - FITTING THE PLATFORM AND CONNECTING CABLES Late last evening I received an email from Alan Fludgate advising me that he had been looking at my photographs and noticed that on two of the seats on the lower deck, I had fitted the seat squab the wrong way around. You can see just make out the two offending seats on the photo above on issue 65. I have looked at the model, and I think the work to swap them over might be too much. I would have to access the screws holding the seats to the flooring by removing the chassis from the body work to then get at the screws under the seat squabs. I think I might strategically position a couple of passengers on those seats to hide my error ( I wont make the same mistake with the upper deck seating). As I struggled with the electrics as described above, I would hate to dissemble the model, to correct the seats and then find my lights did not work again. A shame I did not know about my error when stripping the model back to fix the electrics yesterday, as I would have fixed those at the same time. You will see that the bulkhead light on the nearside front of the passenger compartment does not work. Hachette never included an led bulb or wiring for this light. I am aware from the "Build the Routemaster model 1:12 scale" Facebook page that some people have purchased a bulb and joined the wiring from it to the wiring for the nearside headlamp and fog light under the bonnet. I am not proposing to do this on my model. The seats issued with issue will be completed in issue 68.. |
|
|

|
|
|
|
|
|
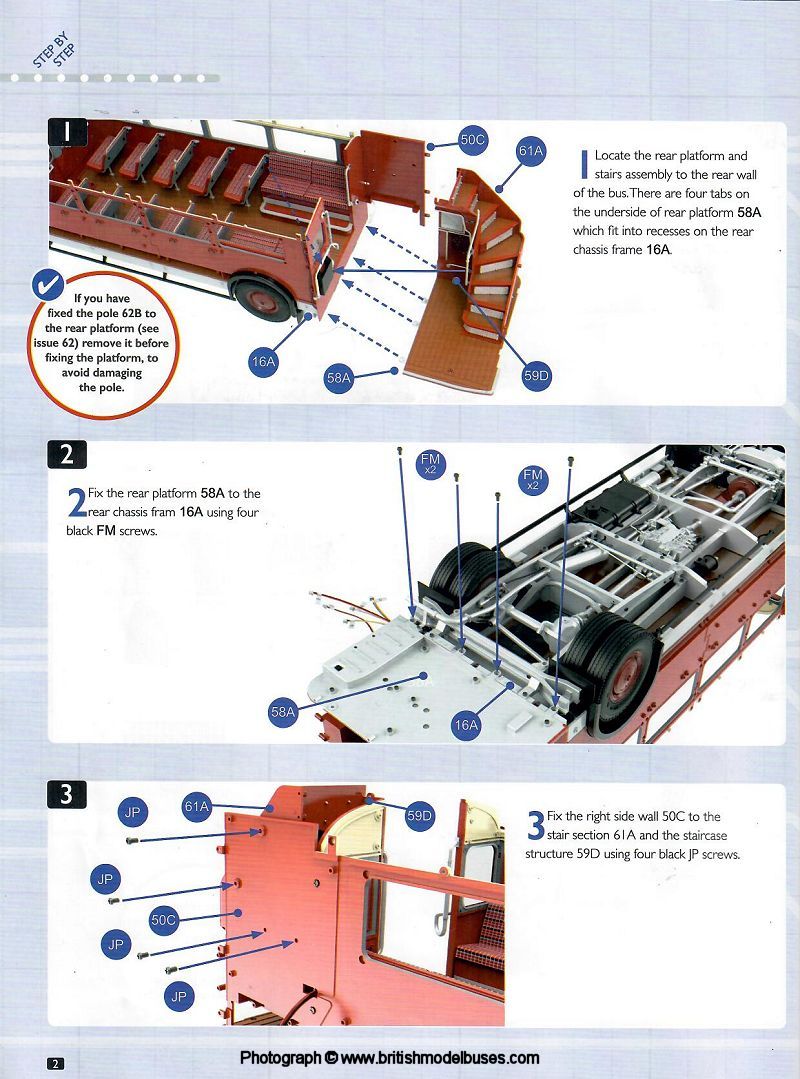
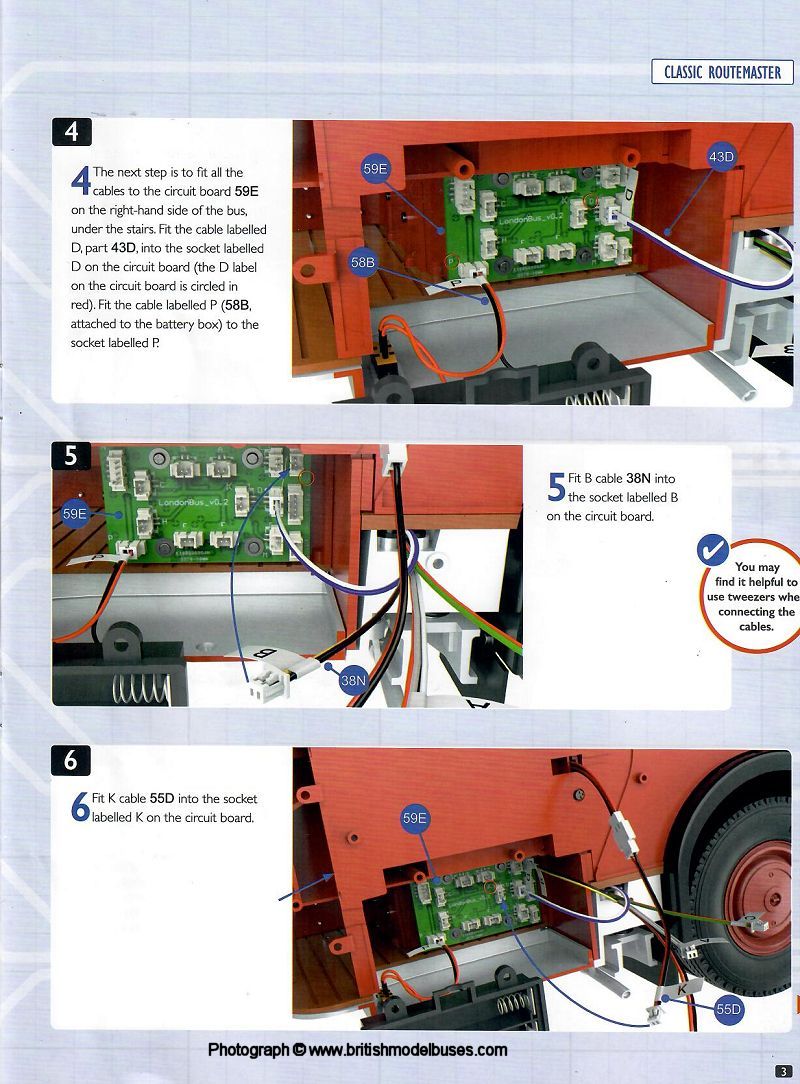
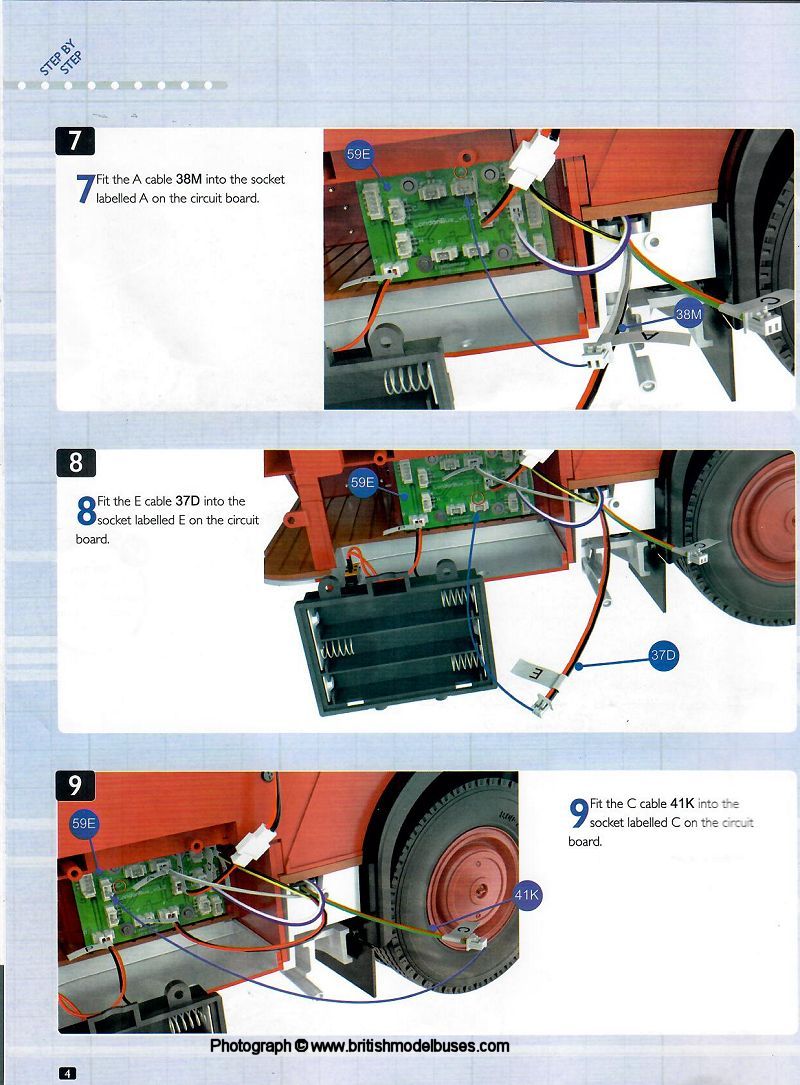
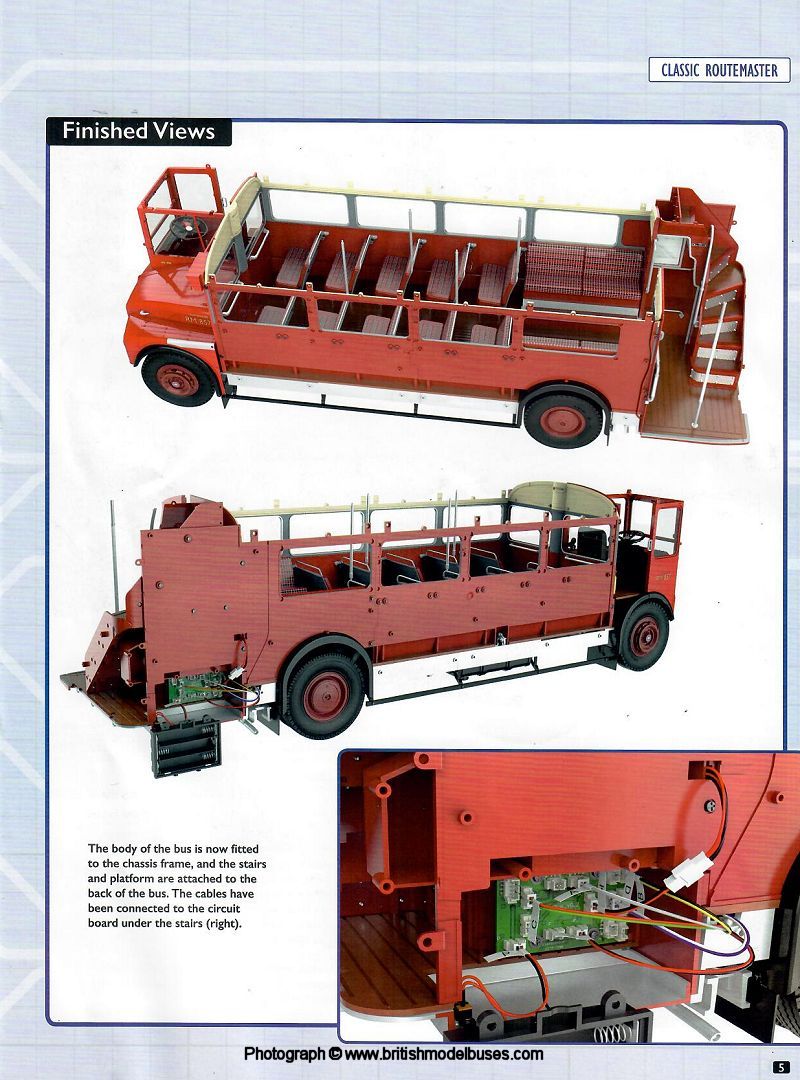
INSTRUCTIONS ISSUE 66 - FITTING THE PLATFORM AND CONNECTING CABLES |
|
|
|
|
|
|
|
|
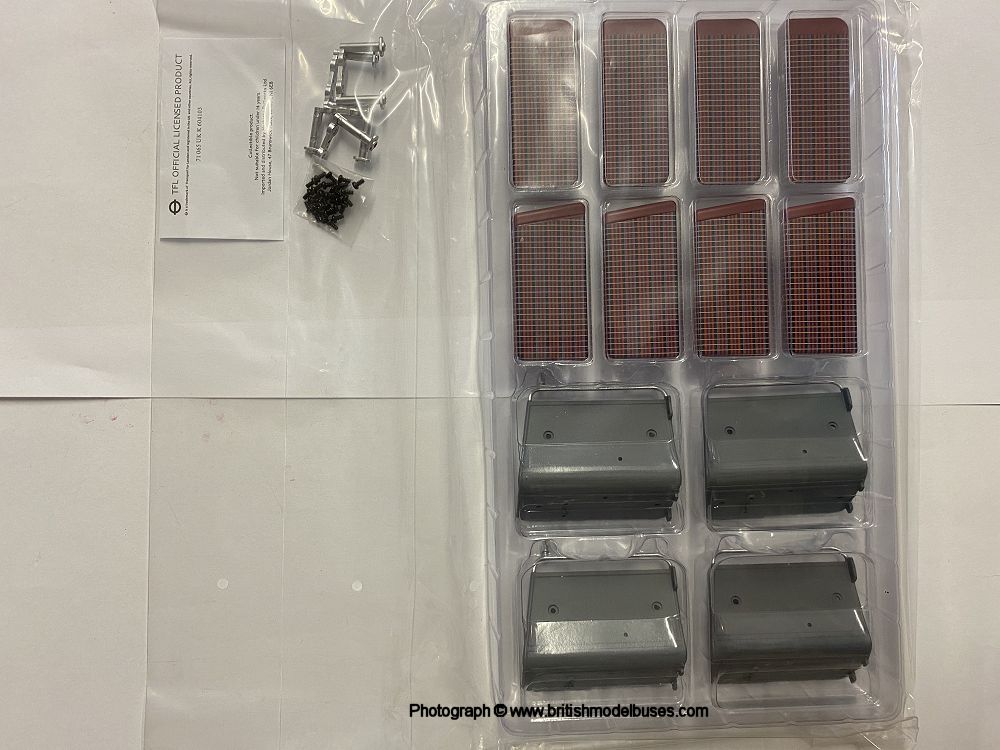
BUILD ISSUE 66 - FITTING THE PLATFORM AND CONNECTING CABLES |
|
|

|

|
|

|
|
|
|
MAGAZINE
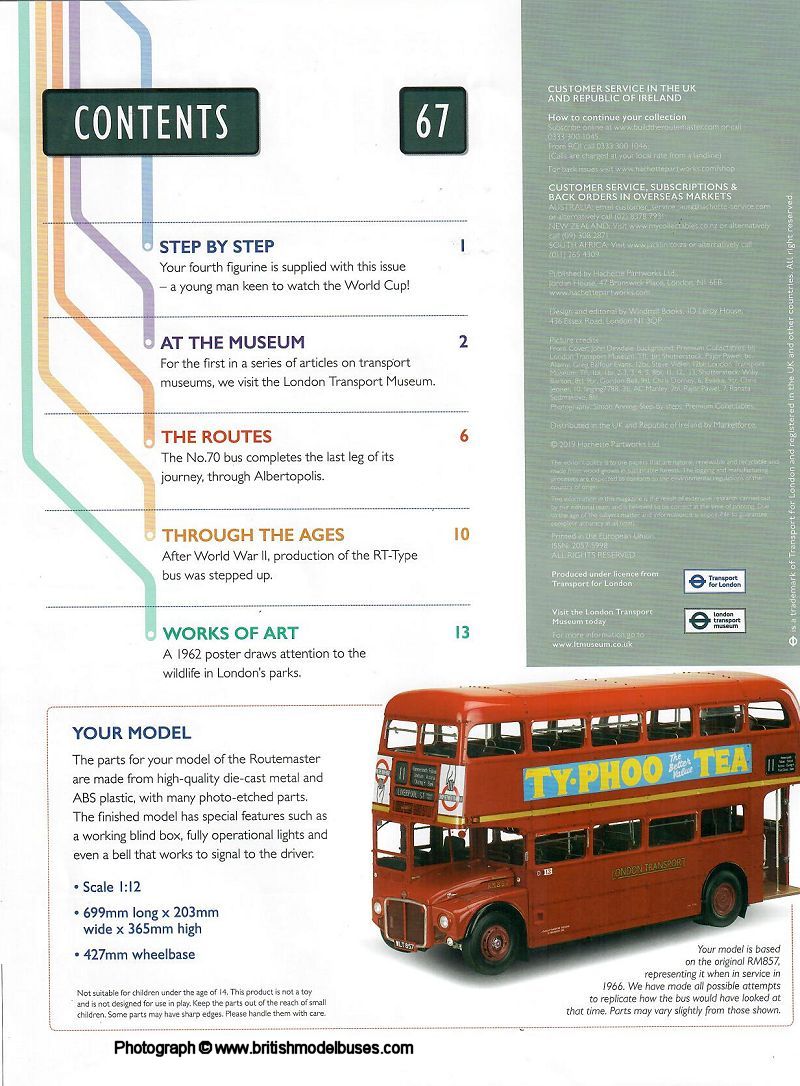
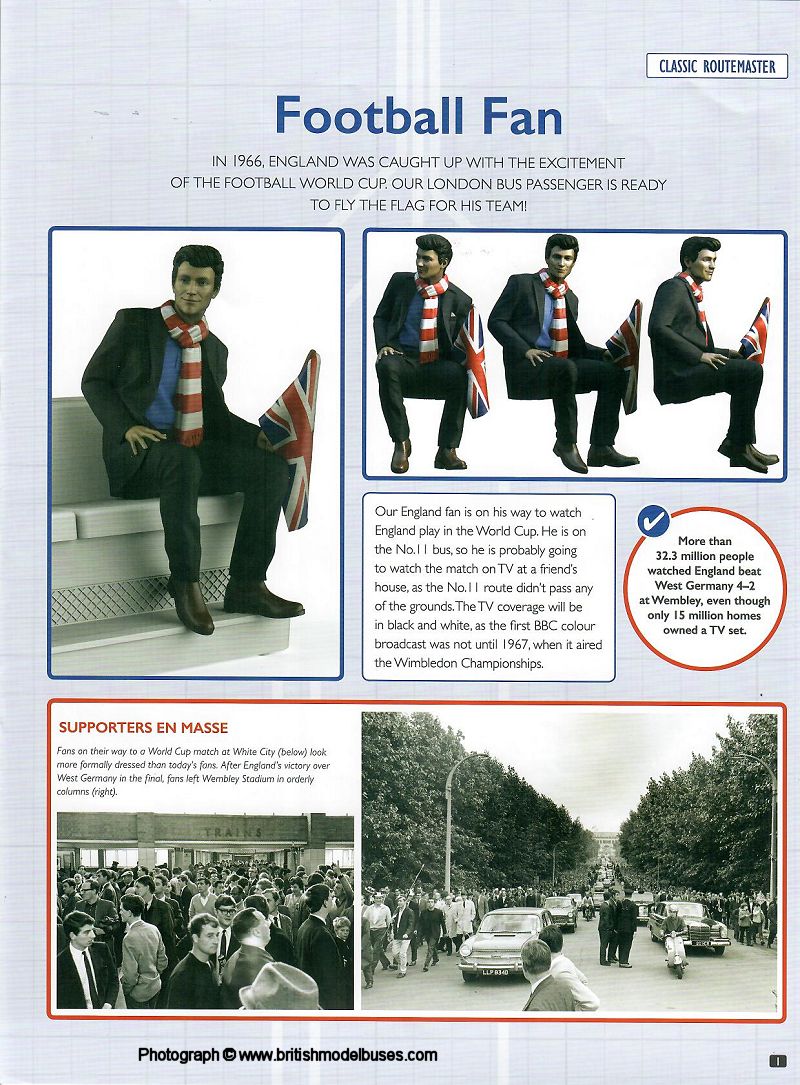
ISSUE 67 - FOOTBALL FAN |
|
|

|
|
|
|
INSTRUCTIONS ISSUE 67 - FOOTBALL FAN |
|
|
|
|
BUILD ISSUE 67 - FOOTBALL FAN |

|
|
|
|
MAGAZINE
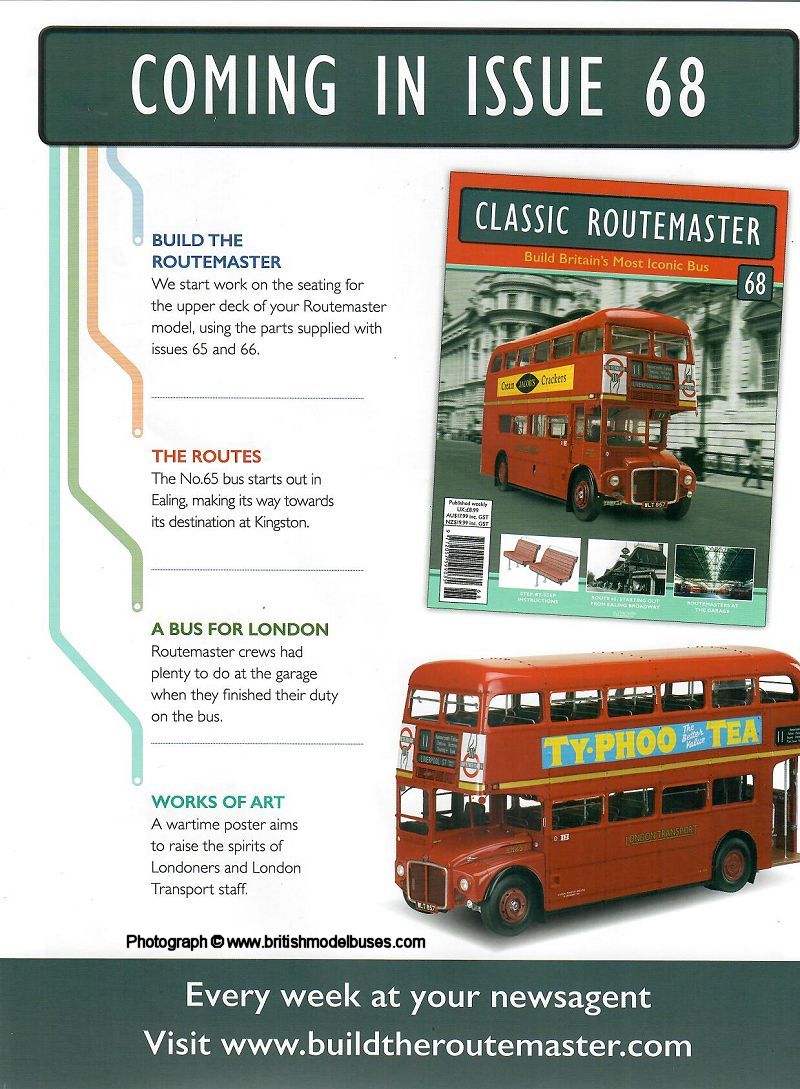
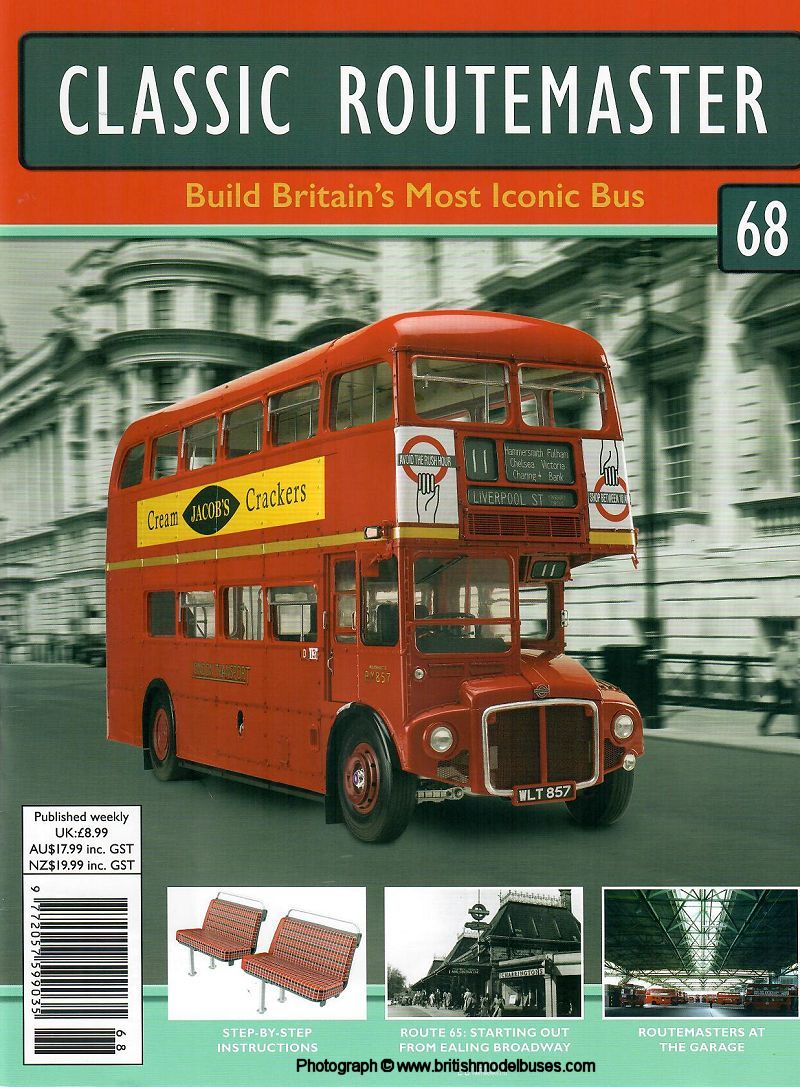
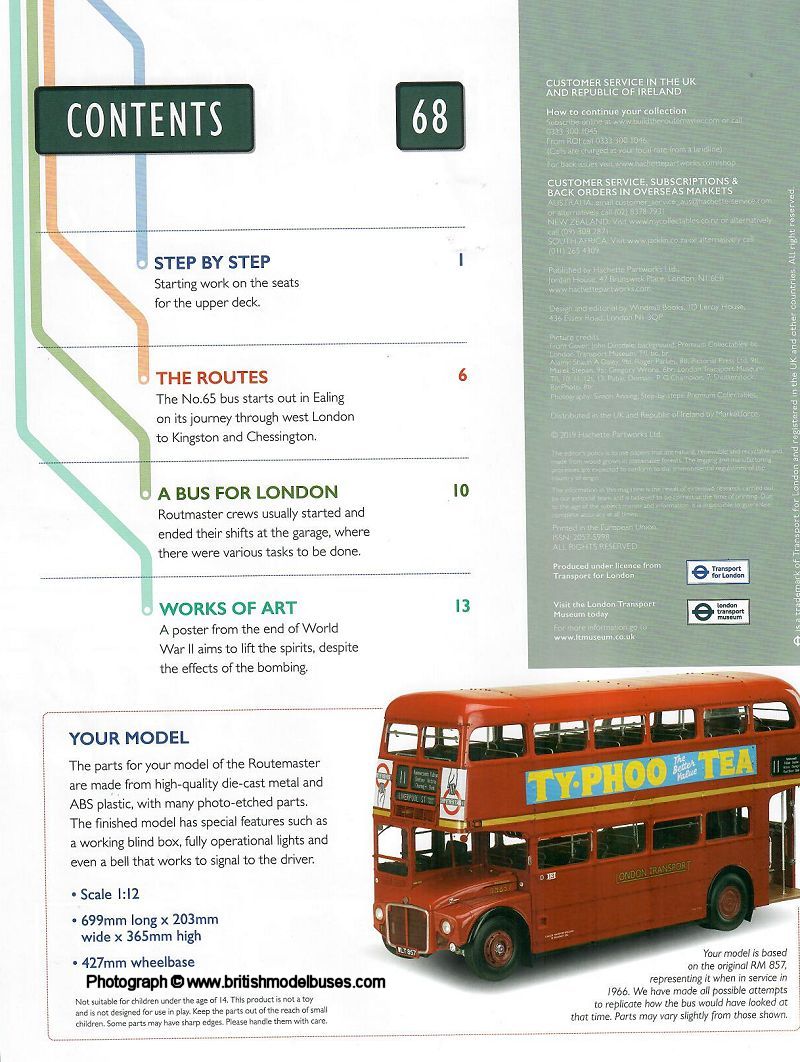
ISSUE 68 - SEATING FOR UPPER DECK - PART 1 |
|
|
|
|

|
|
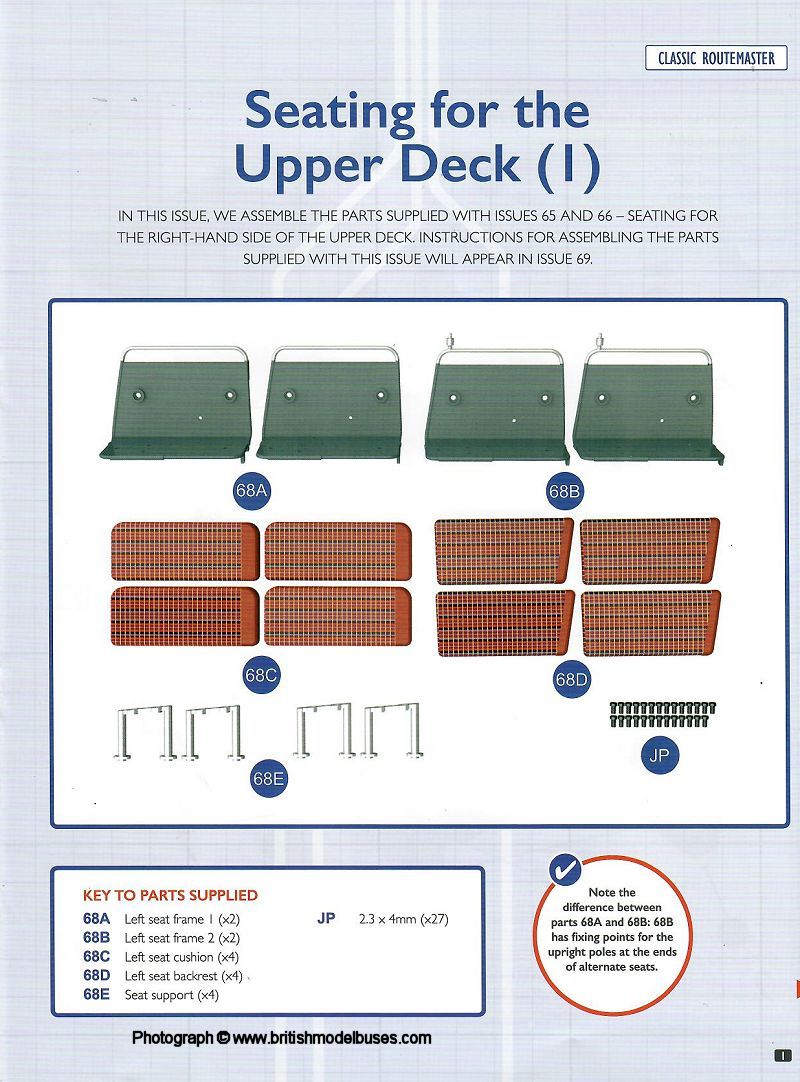
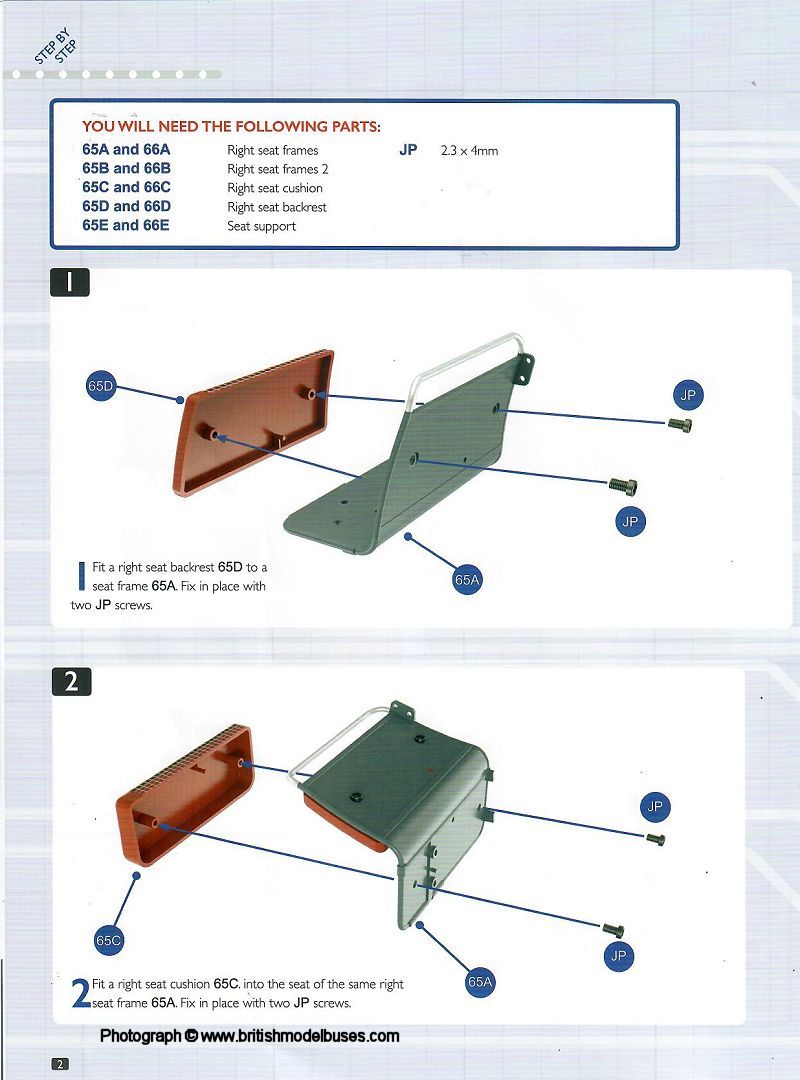
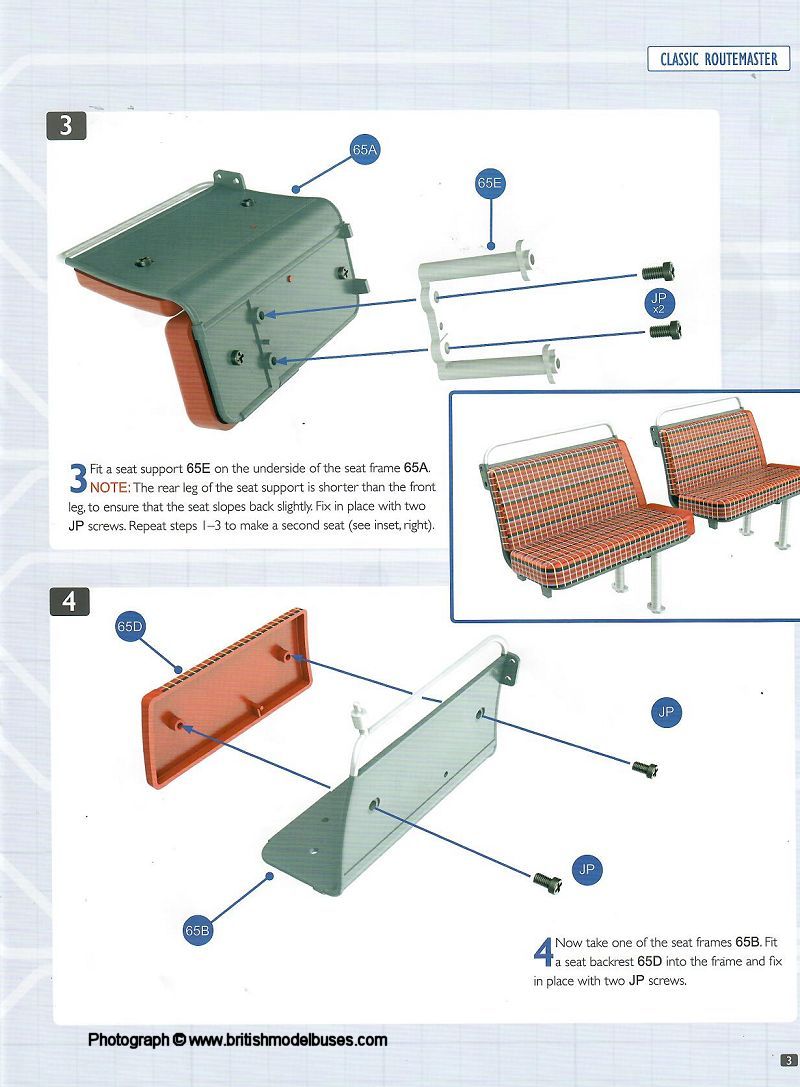
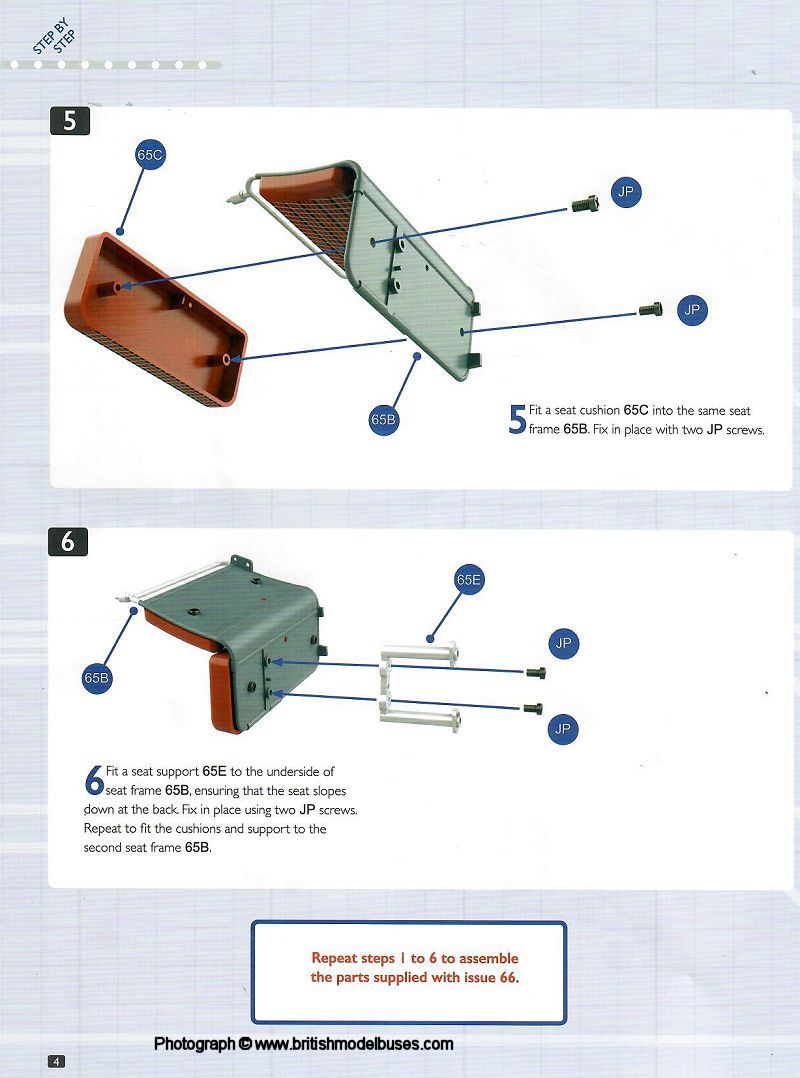
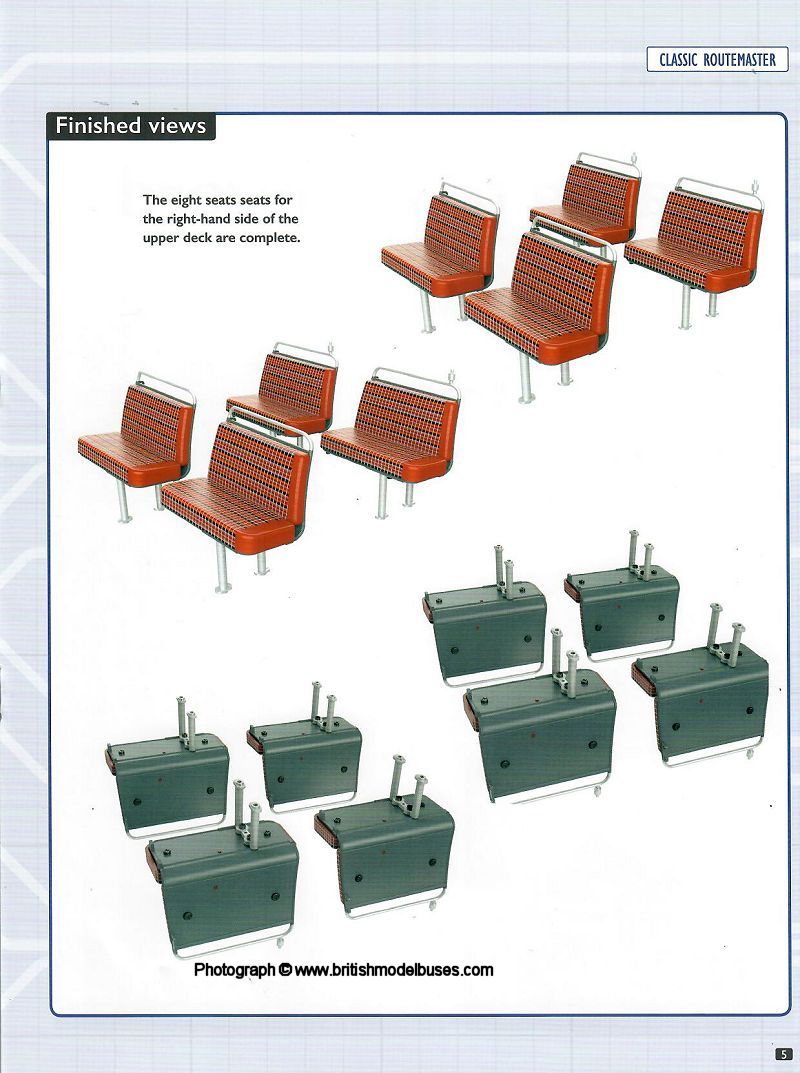
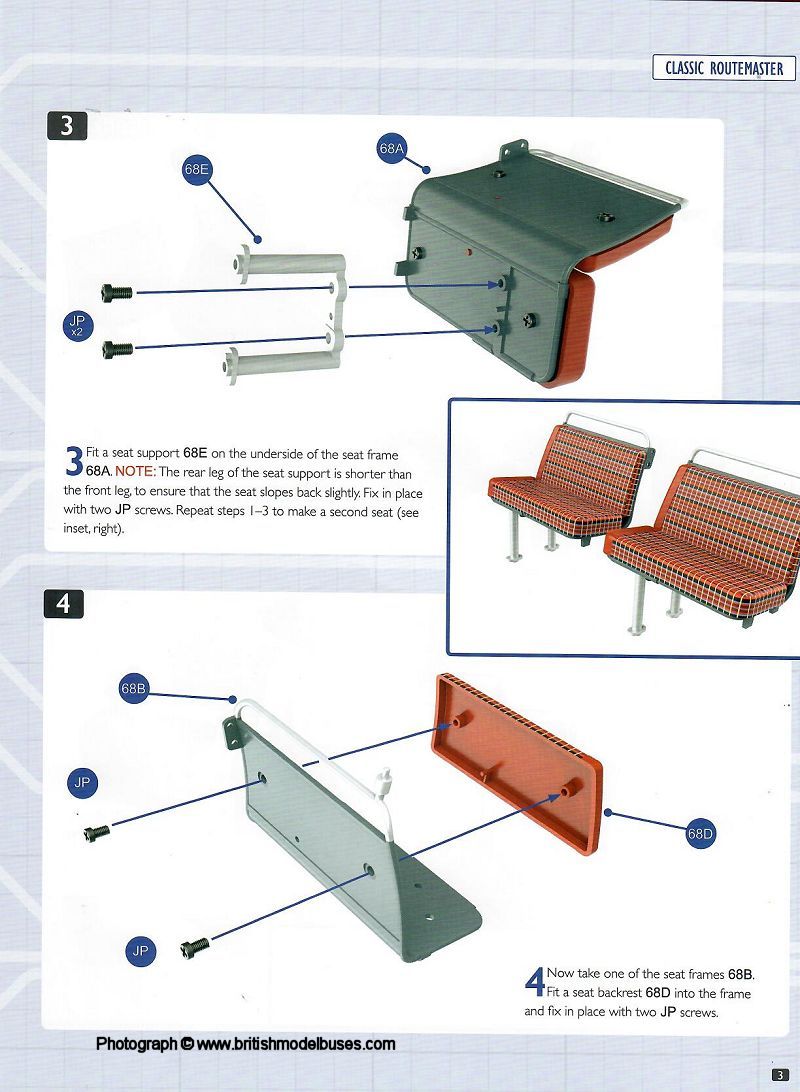
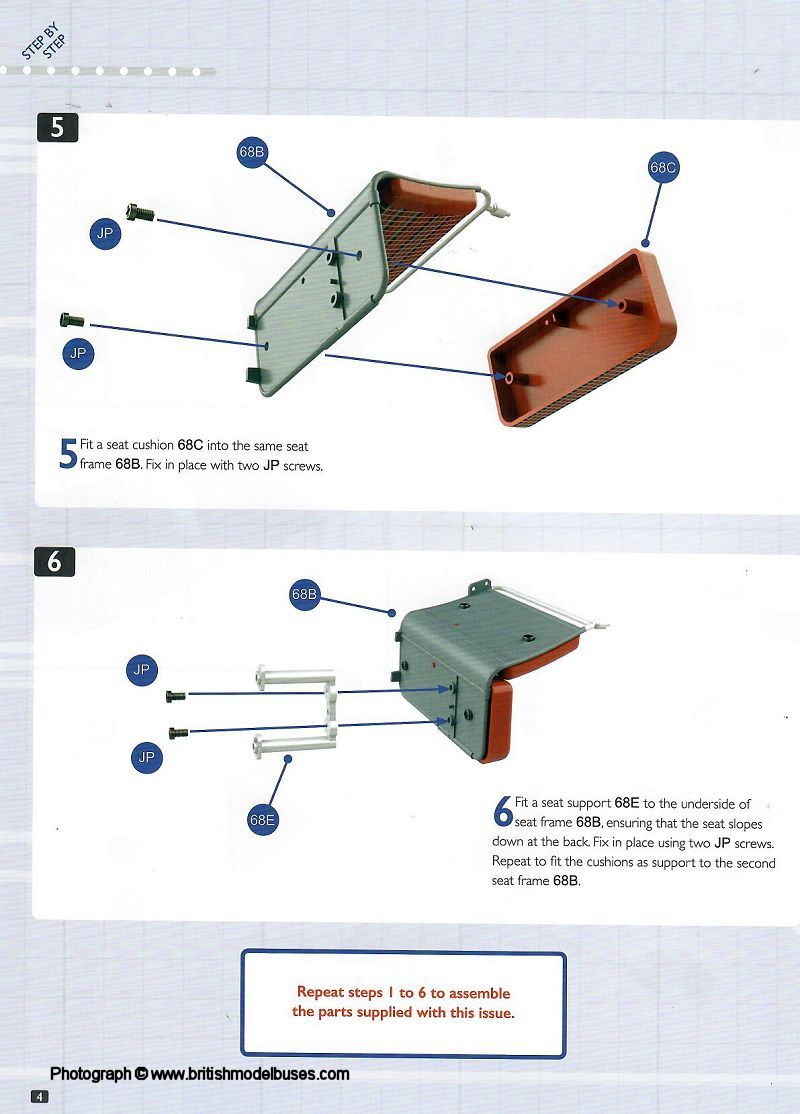
INSTRUCTIONS ISSUE 68 - SEATING FOR UPPER DECK - PART 1 |
|
|
|
|
|
|
|
|
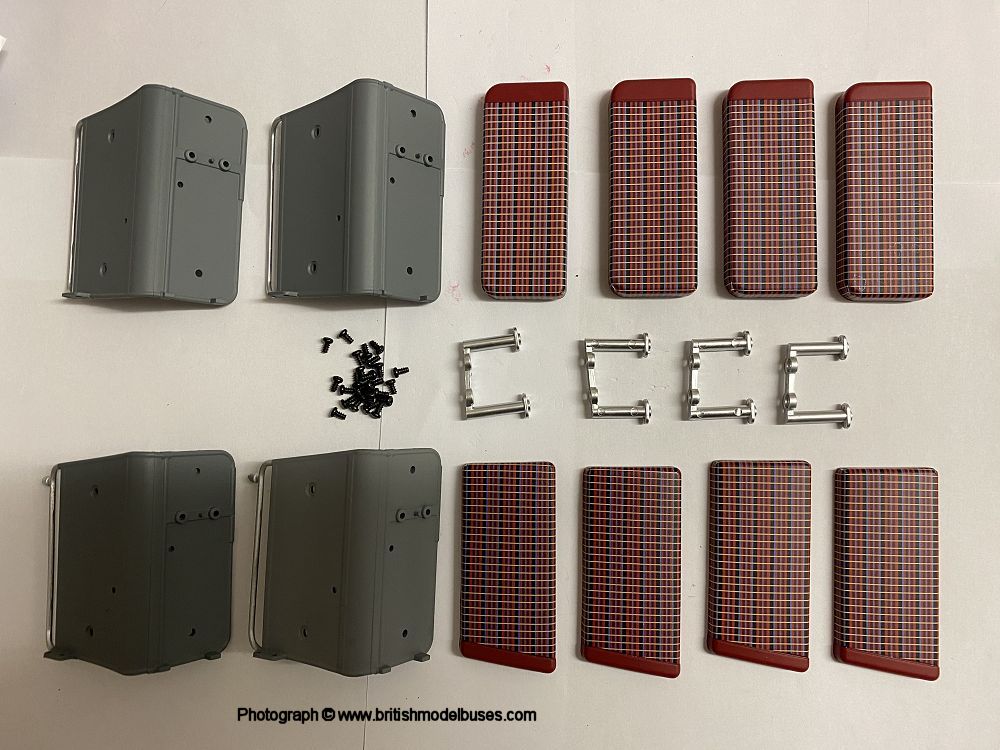
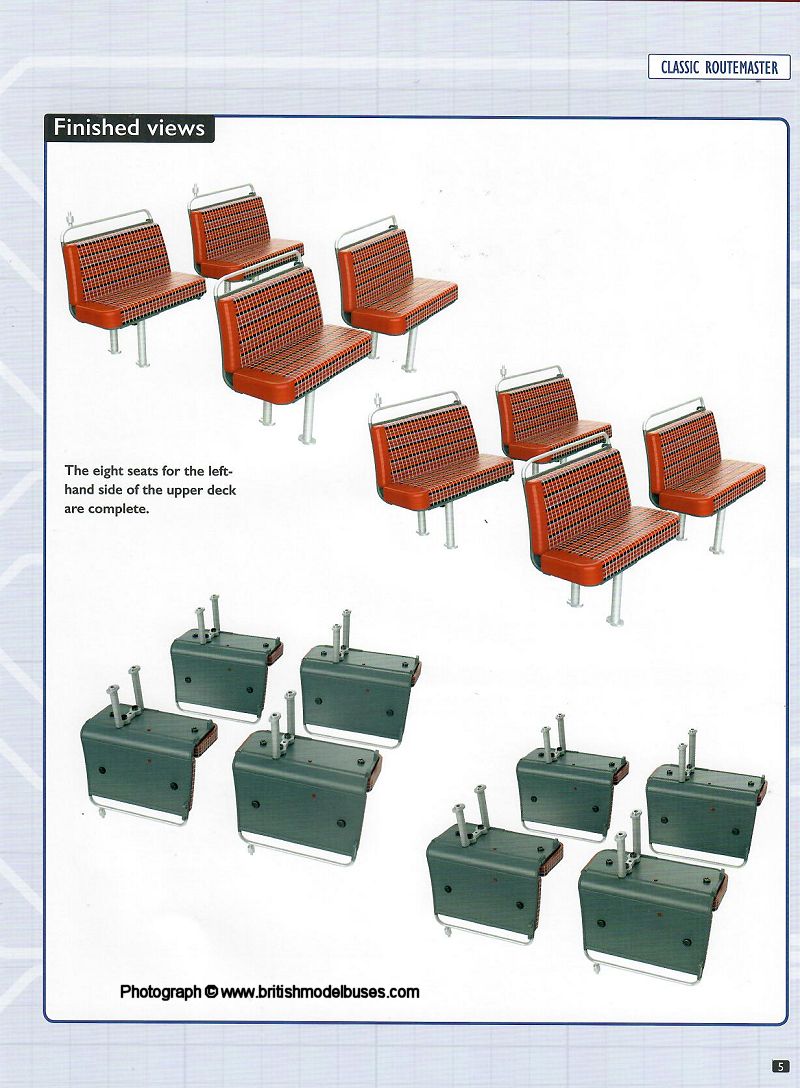
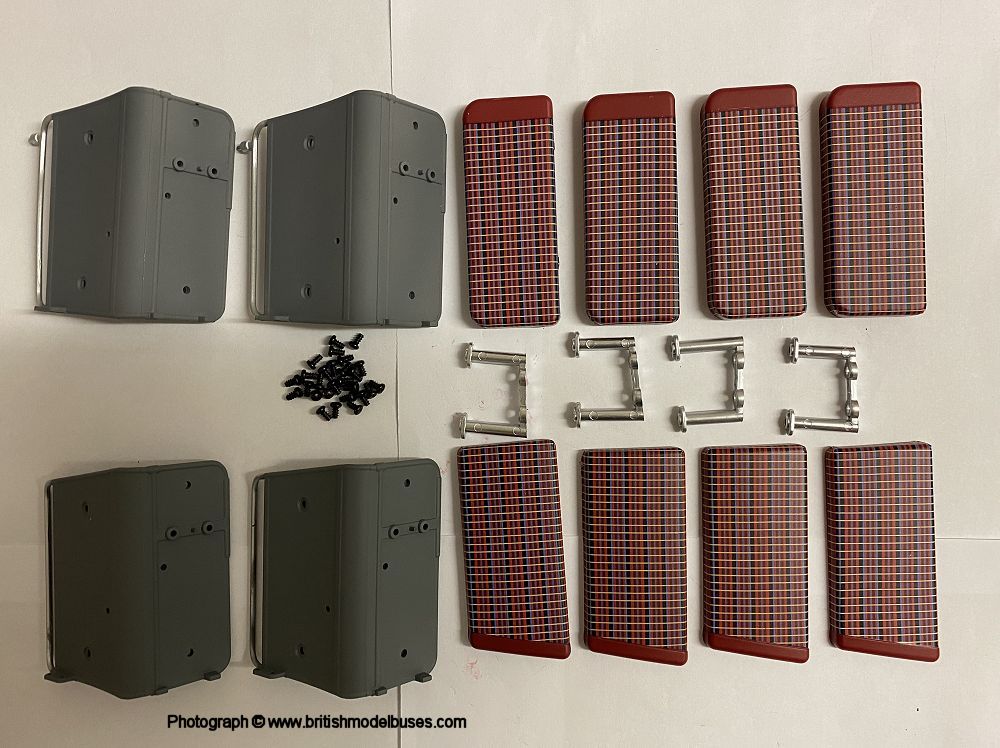
BUILD ISSUE 68 - SEATING FOR UPPER DECK - PART 1 |
|
|

|

|
|
|
|
MAGAZINE
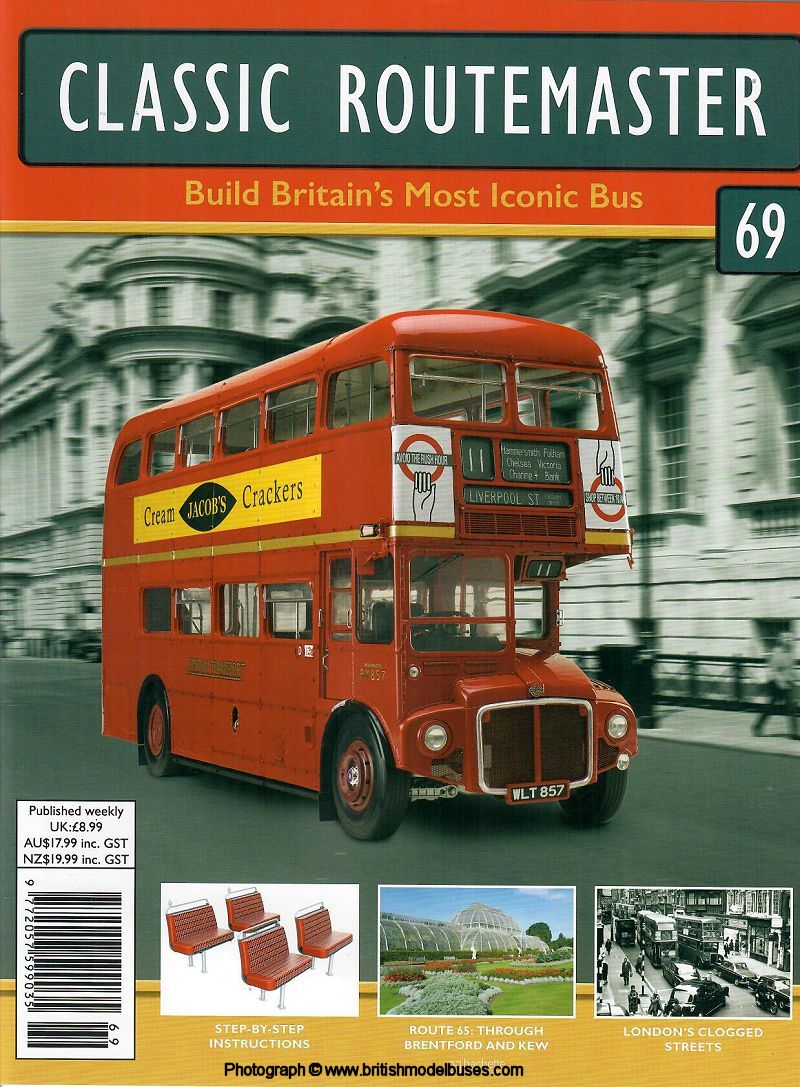
ISSUE 69 - SEATING
FOR UPPER DECK - PART 2 |
|
|
|

|

|
|
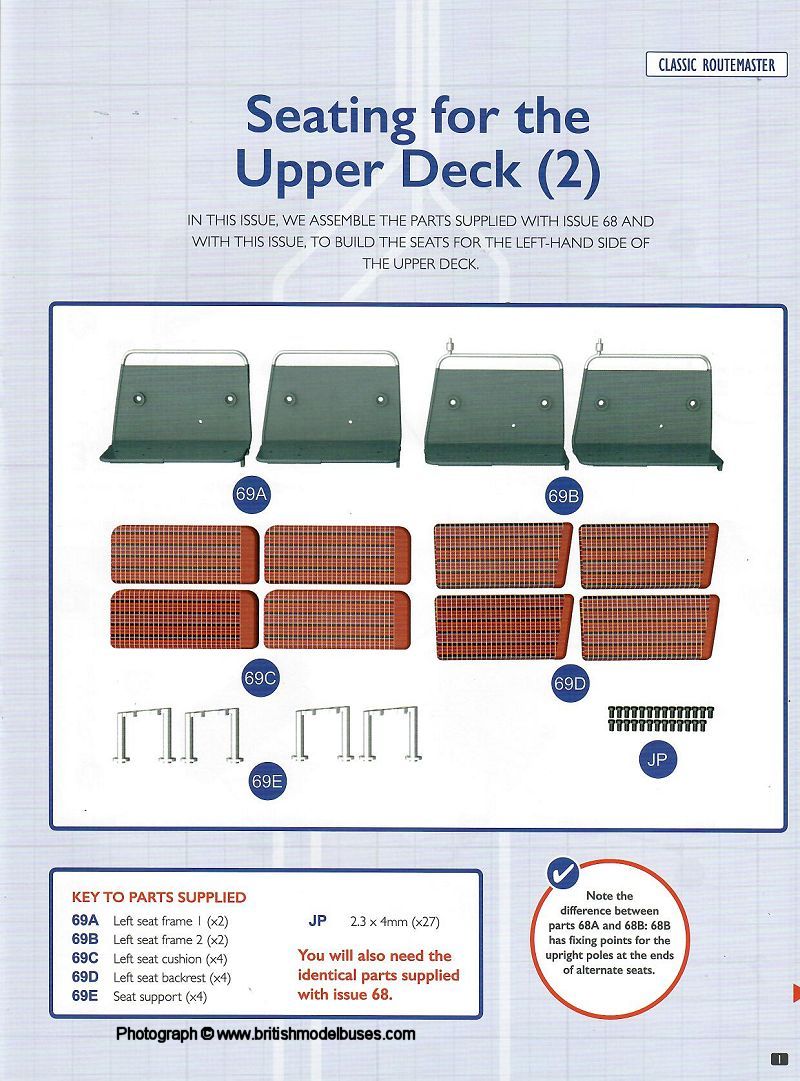
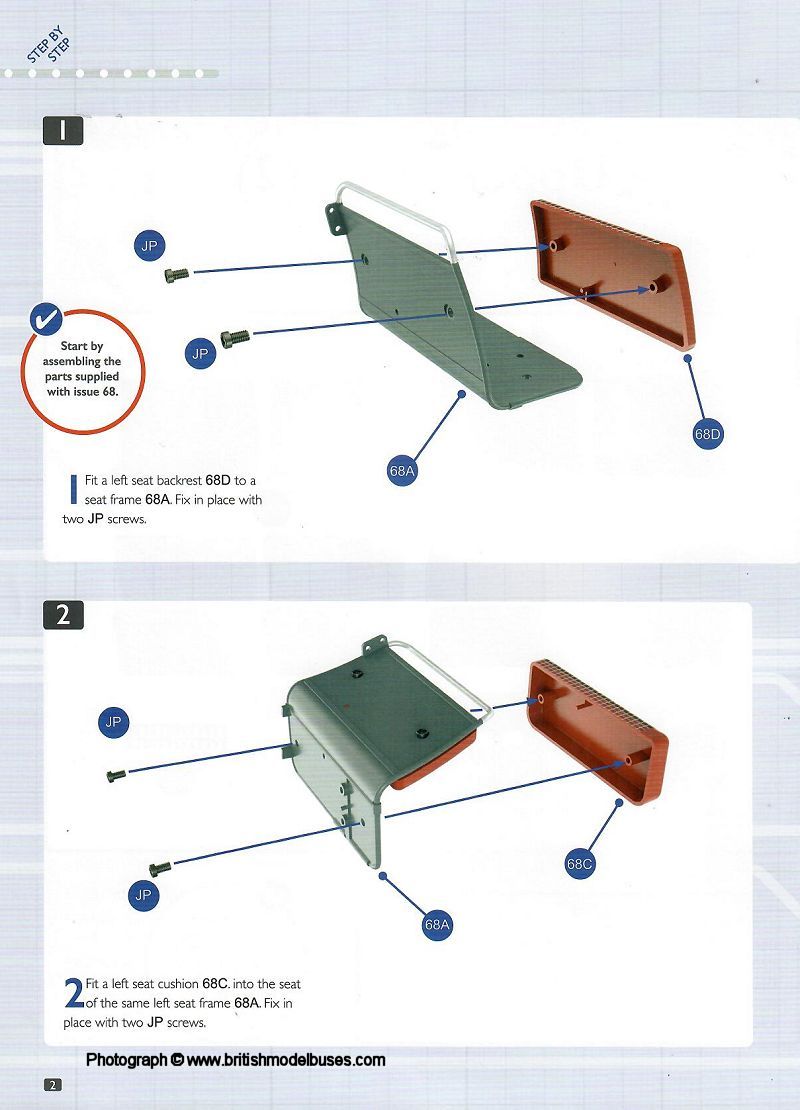
INSTRUCTIONS ISSUE 69 - SEATING FOR UPPER DECK - PART 2 |
|
|
|
|
|
|
|
|
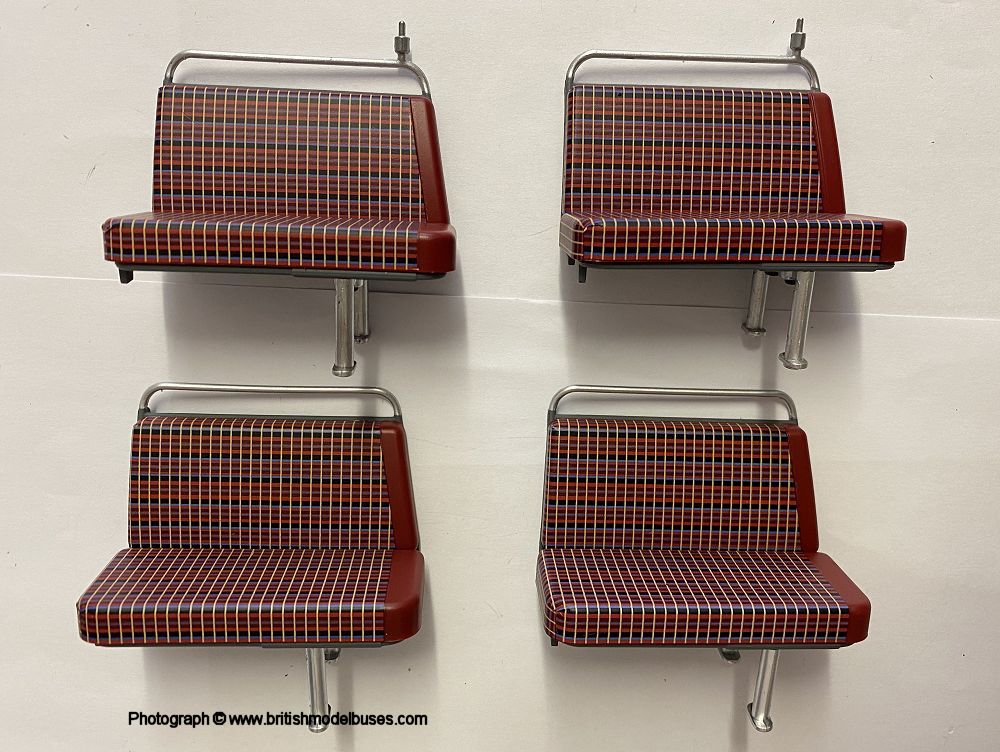
BUILD ISSUE 69 - SEATING FOR UPPER DECK - PART 2 |

|
|

|

|
|
|
|
MAGAZINE
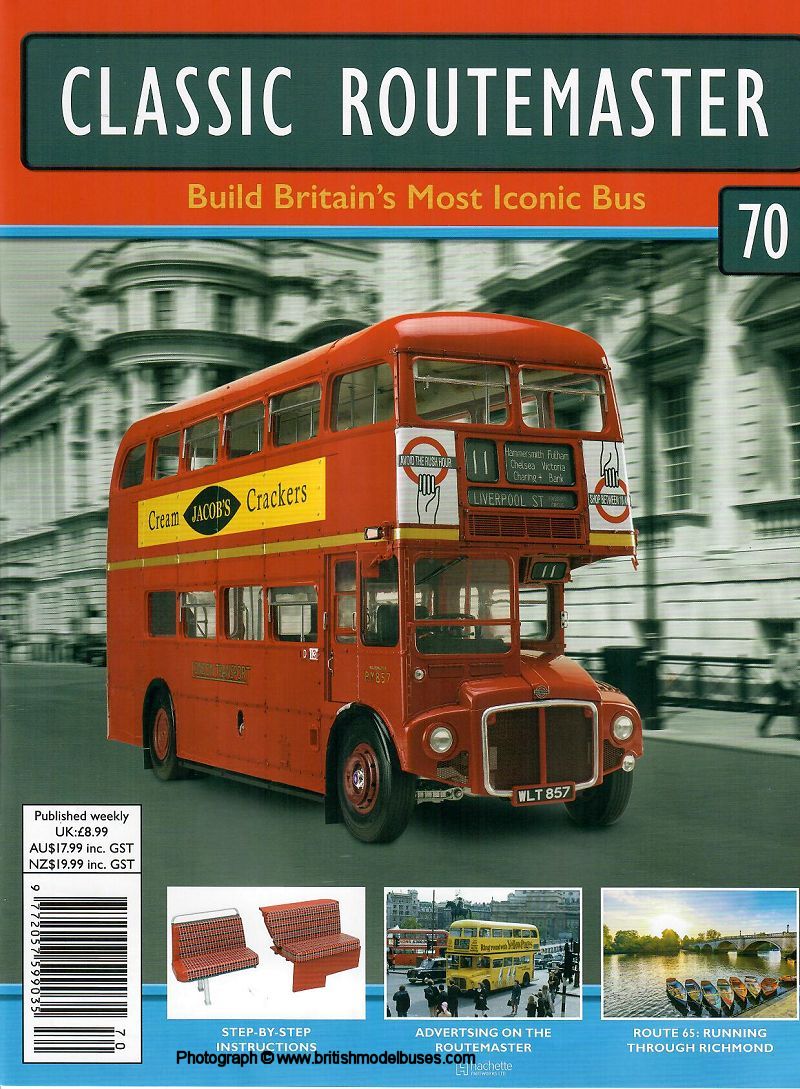
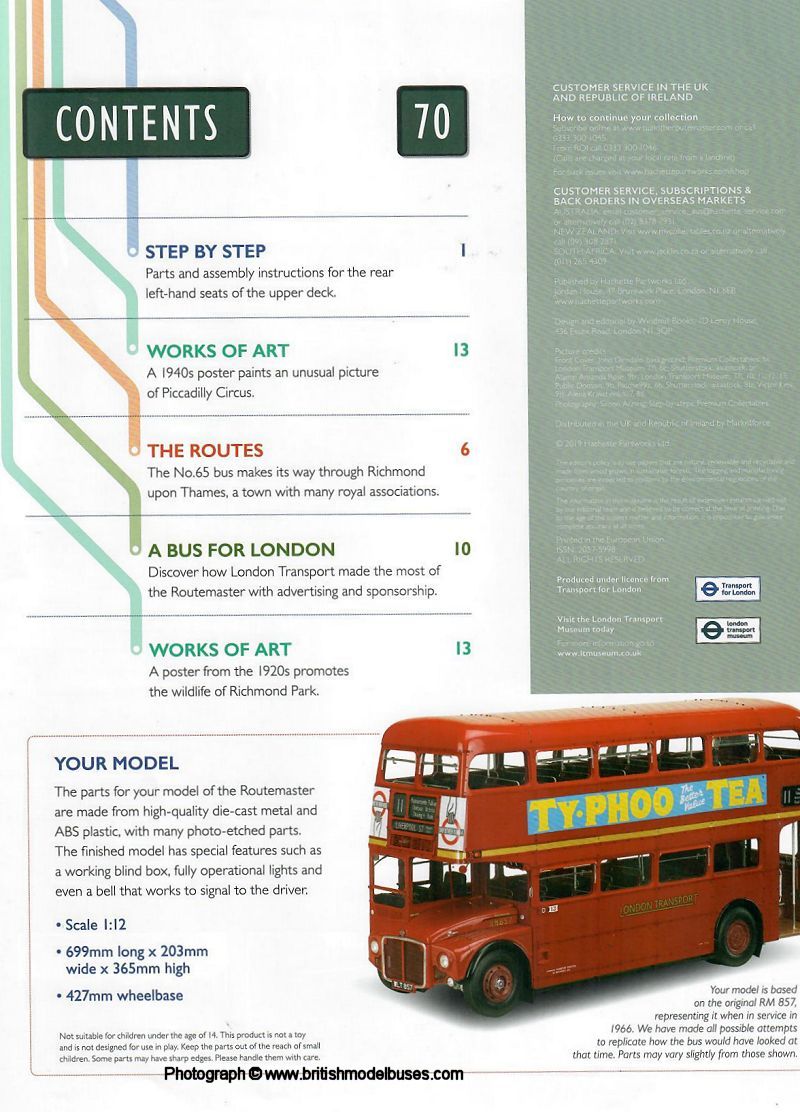
ISSUE 70 - REAR
SEATS FOR THE UPPER DECK
|
|
|
|
|

|
|
INSTRUCTIONS ISSUE 70 - REAR SEATS FOR THE UPPER DECK |

|

|

|

|
|
|
|
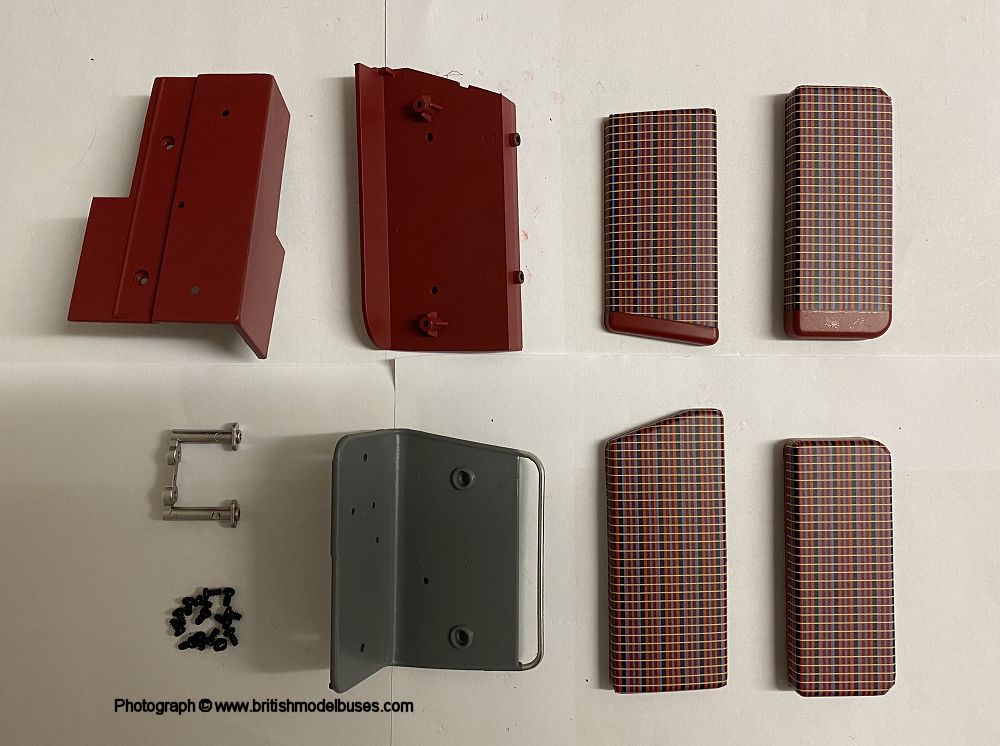
BUILD ISSUE 70 - REAR SEATS FOR THE UPPER DECK |

|
|

|
|
|
|
BUILD YOU OWN ROUTEMASTER ISSUES SIXTY ONE TO SEVENTY |
|
|
|
|
|
This page last updated Friday, 24 April 2020 |
| © British Model Buses 2020 |